Step 1: Gather your materials

Get everything you'll need together.
* fairly strong thread, coordinating or contrasting - typically, you want thread that is slightly less strong than what you're sewing so that the thread will rip rather than the cloth and you can re-sew it. For these bags, I prefer the stitches to stay and not get snagged or rip because I'm not going to be re-sewing this in the future, so I use the strongest thread I've got.
* 16"x12" piece of exterior fabric
* 4.5"x12" piece of exterior fabric (this piece can be wider or skinnier, the handle will be the width (4.5") minus the seam allowance (1/2") divided by two (in my case, 2" handle width))
* 16"x12" piece of lining fabric
* 16"x12" piece of interfacing or batting (fusible or not, either is okay)
* (optional) 1.75"x12" piece of interfacing (this will be for the handle, make sure it's close to but smaller than the final handle width (in my case, 2"))
* 12" or longer zipper (I'm using a 55 cm because that's what I've got!)
* pins, rotary cutter and/or scissors, ruler, chopstick or similar for popping out the corners of the finished bags
Step 2: Iron Stuff

Make sure your fabrics are ironed. Do not iron your interfacing if it's fusible! Once your fabric is ironed, you can iron the large piece of fusible interfacing (if you're using it) to the back side of the large piece of exterior fabric.
Step 3: Pinning

Lay down your lining right side up, with the zipper right side up on top of it (I'm using an invisible zipper), followed by the exterior right side down, and last the interfacing/batting. Pin it and mark 1/2" from either side.
Step 4: Sewing

I love my vertical zipper foot. Absolutely love it. It gives me a nice close edge on an invisible zipper and is just so much nicer than your typical zipper foot. Use whatever zipper foot you want to sew close to the teeth of the zipper. Make sure to backstitch at either end to secure the thread. Do NOT sew past the 1/2" marks on either side; it will create a hassle later on!
Step 5: Ironing Again

Press open all your fabric. Press open your lining first, then press the exterior fabric plus interfacing/batting.

Step 6: More Sewing

Topstitch. I use the width of the zipper foot as a guide for my stitching, though you can switch back to your normal presser foot if you prefer. Again, remember to backstitch and do NOT sew past the 1/2" marks on either side!
Step 7: Pin again

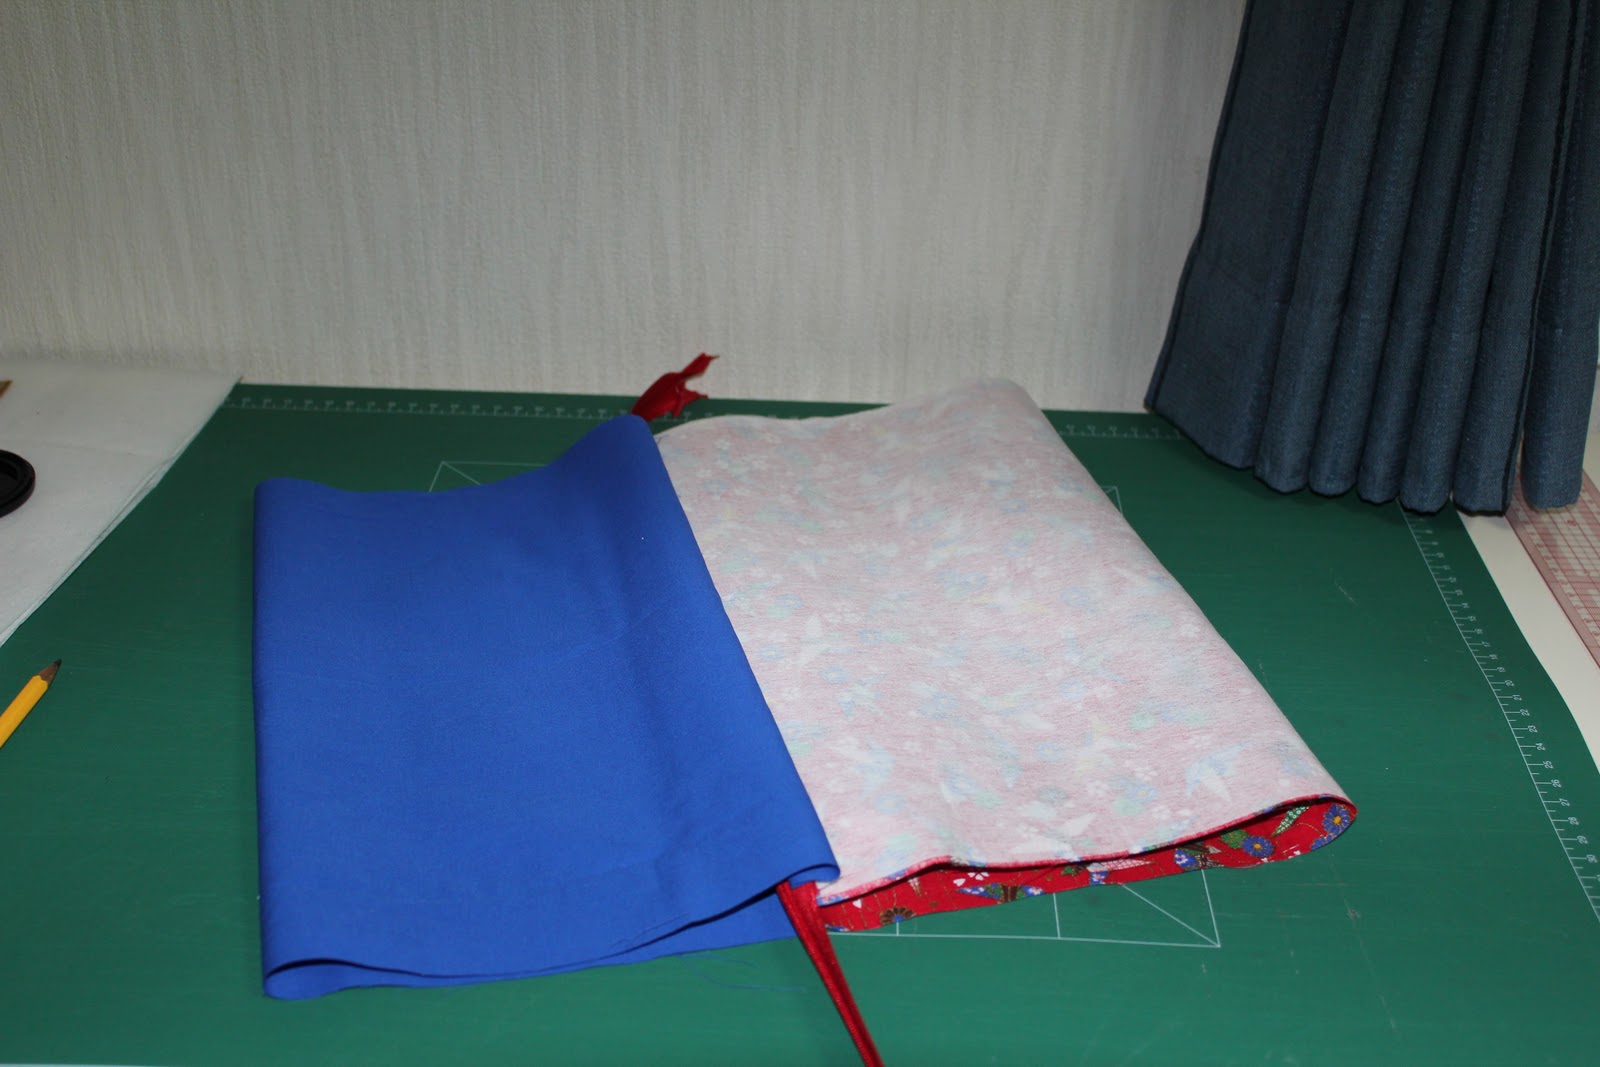
Same as before, but this time fold the lining back to make one tube (blue tube on bottom), then fold the exterior plus interfacing/batting the other way to make a second tube (top tube). You still want lining right side up, zipper right side up, exterior right side down, interfacing/batting, and mark that 1/2" from either side.
Step 8: Sew, sew, sew your zipper
Same as Step 4. Reminder, backstitching is good and do NOT sew past the 1/2" marks on either side!
Step 9: Press

This time, it's easier if you open the zipper all the way to turn the bag right-side-out to press it. Press as in Step 5.

Step 10: Topstich
Same as Step 6, but more difficult. Open and close the zipper as necessary to navigate around the other side, especially if you have a 12" zipper. One last time, backstitch to start and finish, and do NOT sew past the 1/2" marks on either side!
Step 11: Inside-Out Again
Flip everything back to where it was originally, with the lining making one tube and the exterior and interfacing/batting making a second. Zip the zipper 100% closed. Prepare for Step 12.
Step 12: Pin Stuff

Line up your tubes so the zipper is exactly centered for both tubes, and pin each tube separately

Step 13: Sew Again

Sew across each tube, no need for backstitching this time. Give it a 3/8" seam and use your zipper foot so you can get as close to the zipper as possible. Sew the lining by itself and the zipper, exterior, and interfacing/batting together. If your zipper extends past the edge, make sure you open it enough to have the zipper pull inside the bag when you sew the edge. Otherwise it won't open! I know from experience...
Step 14: Cut!

Trim the edges, especially if you've got some hanging zipper ends like I do.

Now, use a clear ruler if you've got one, and cut out 1.25" squares from every corner (both the lining tube and the everything else tube), lining up the square with the folded side edge and the seam, not the cut edge.

Step 15: Pin!

Using the corner holes, open your zipper up completely. Now this next bit is a bit difficult to visualize and figure out the first time. Open up the hole in the corner, and line up the seam with the small crease the fold makes. You'll be folding at the cut corners.

Pin 5 of the corners together, leaving one liner corner and the two exterior corners on either side of the top of the bag (where the zipper pull is when the bag is closed) unpinned.
Step 16: Make handle

Fold the 4.5"x12" piece of exterior fabric in half and iron.

Sew the long edge to turn it into a tube.

Re-fold it and iron the seam open.
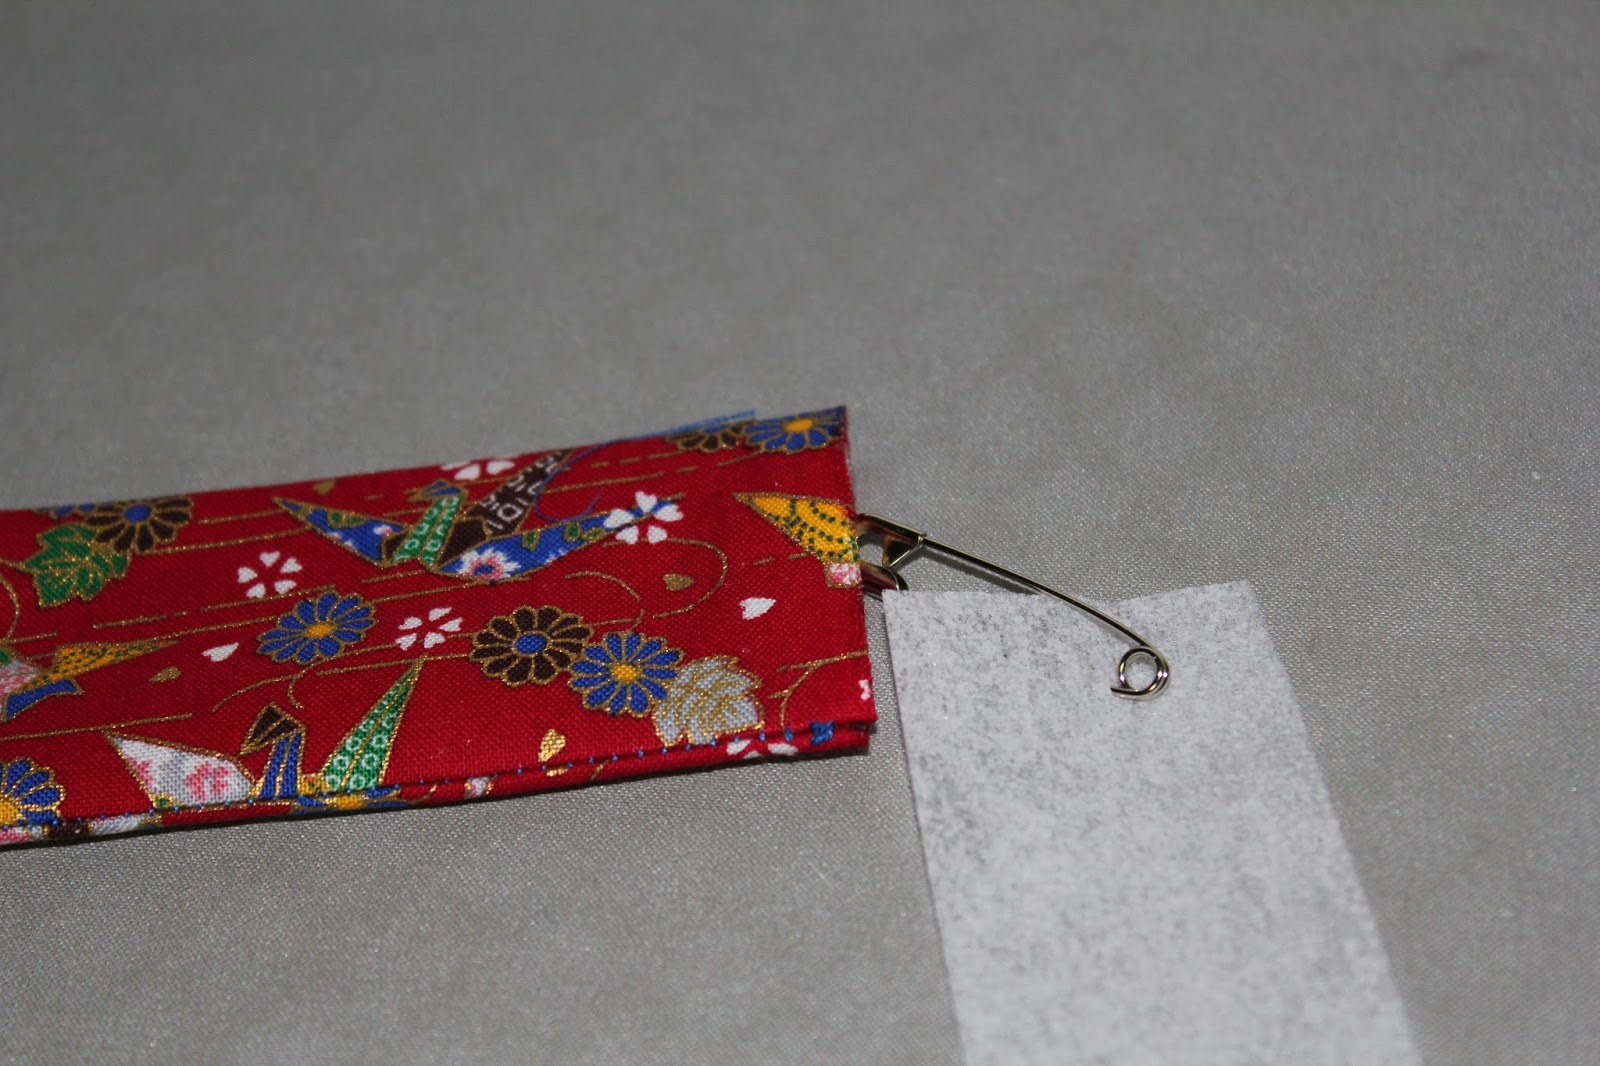
Turn the handle right-side-out. If adding interfacing to stiffen the handle, make sure the width is slightly smaller than the width of the handle and feed it through the fabric tube (I use a safety pin to help me feed it through.

Stitch a few lines on the handle for decoration and so it stays flat. I like to use one straight line roughly 3/8" from either end and a decorative stitch down the center.
Step 17: Pin!

Pin the handle into the two exterior corners left open from Step 15. Center the handle and line up the edge of the handle with the edge of the bag.
Step 18: Sew!
Sew all 4 of the outer corners and the 3 pinned liner corners with a 3/8" seam.

I also like to go over the zipper a few times to be sure it is secure and to tack the lining and exterior together along those seams.

Use the last open liner corner to turn the bag right-side-out.
Step 19: Finish!

Finally, fold in the edges on that last liner corner and sew that one up too. Run a chopstick or something similar along the corner seams on the inside of the bag to fully open them up if necessary.
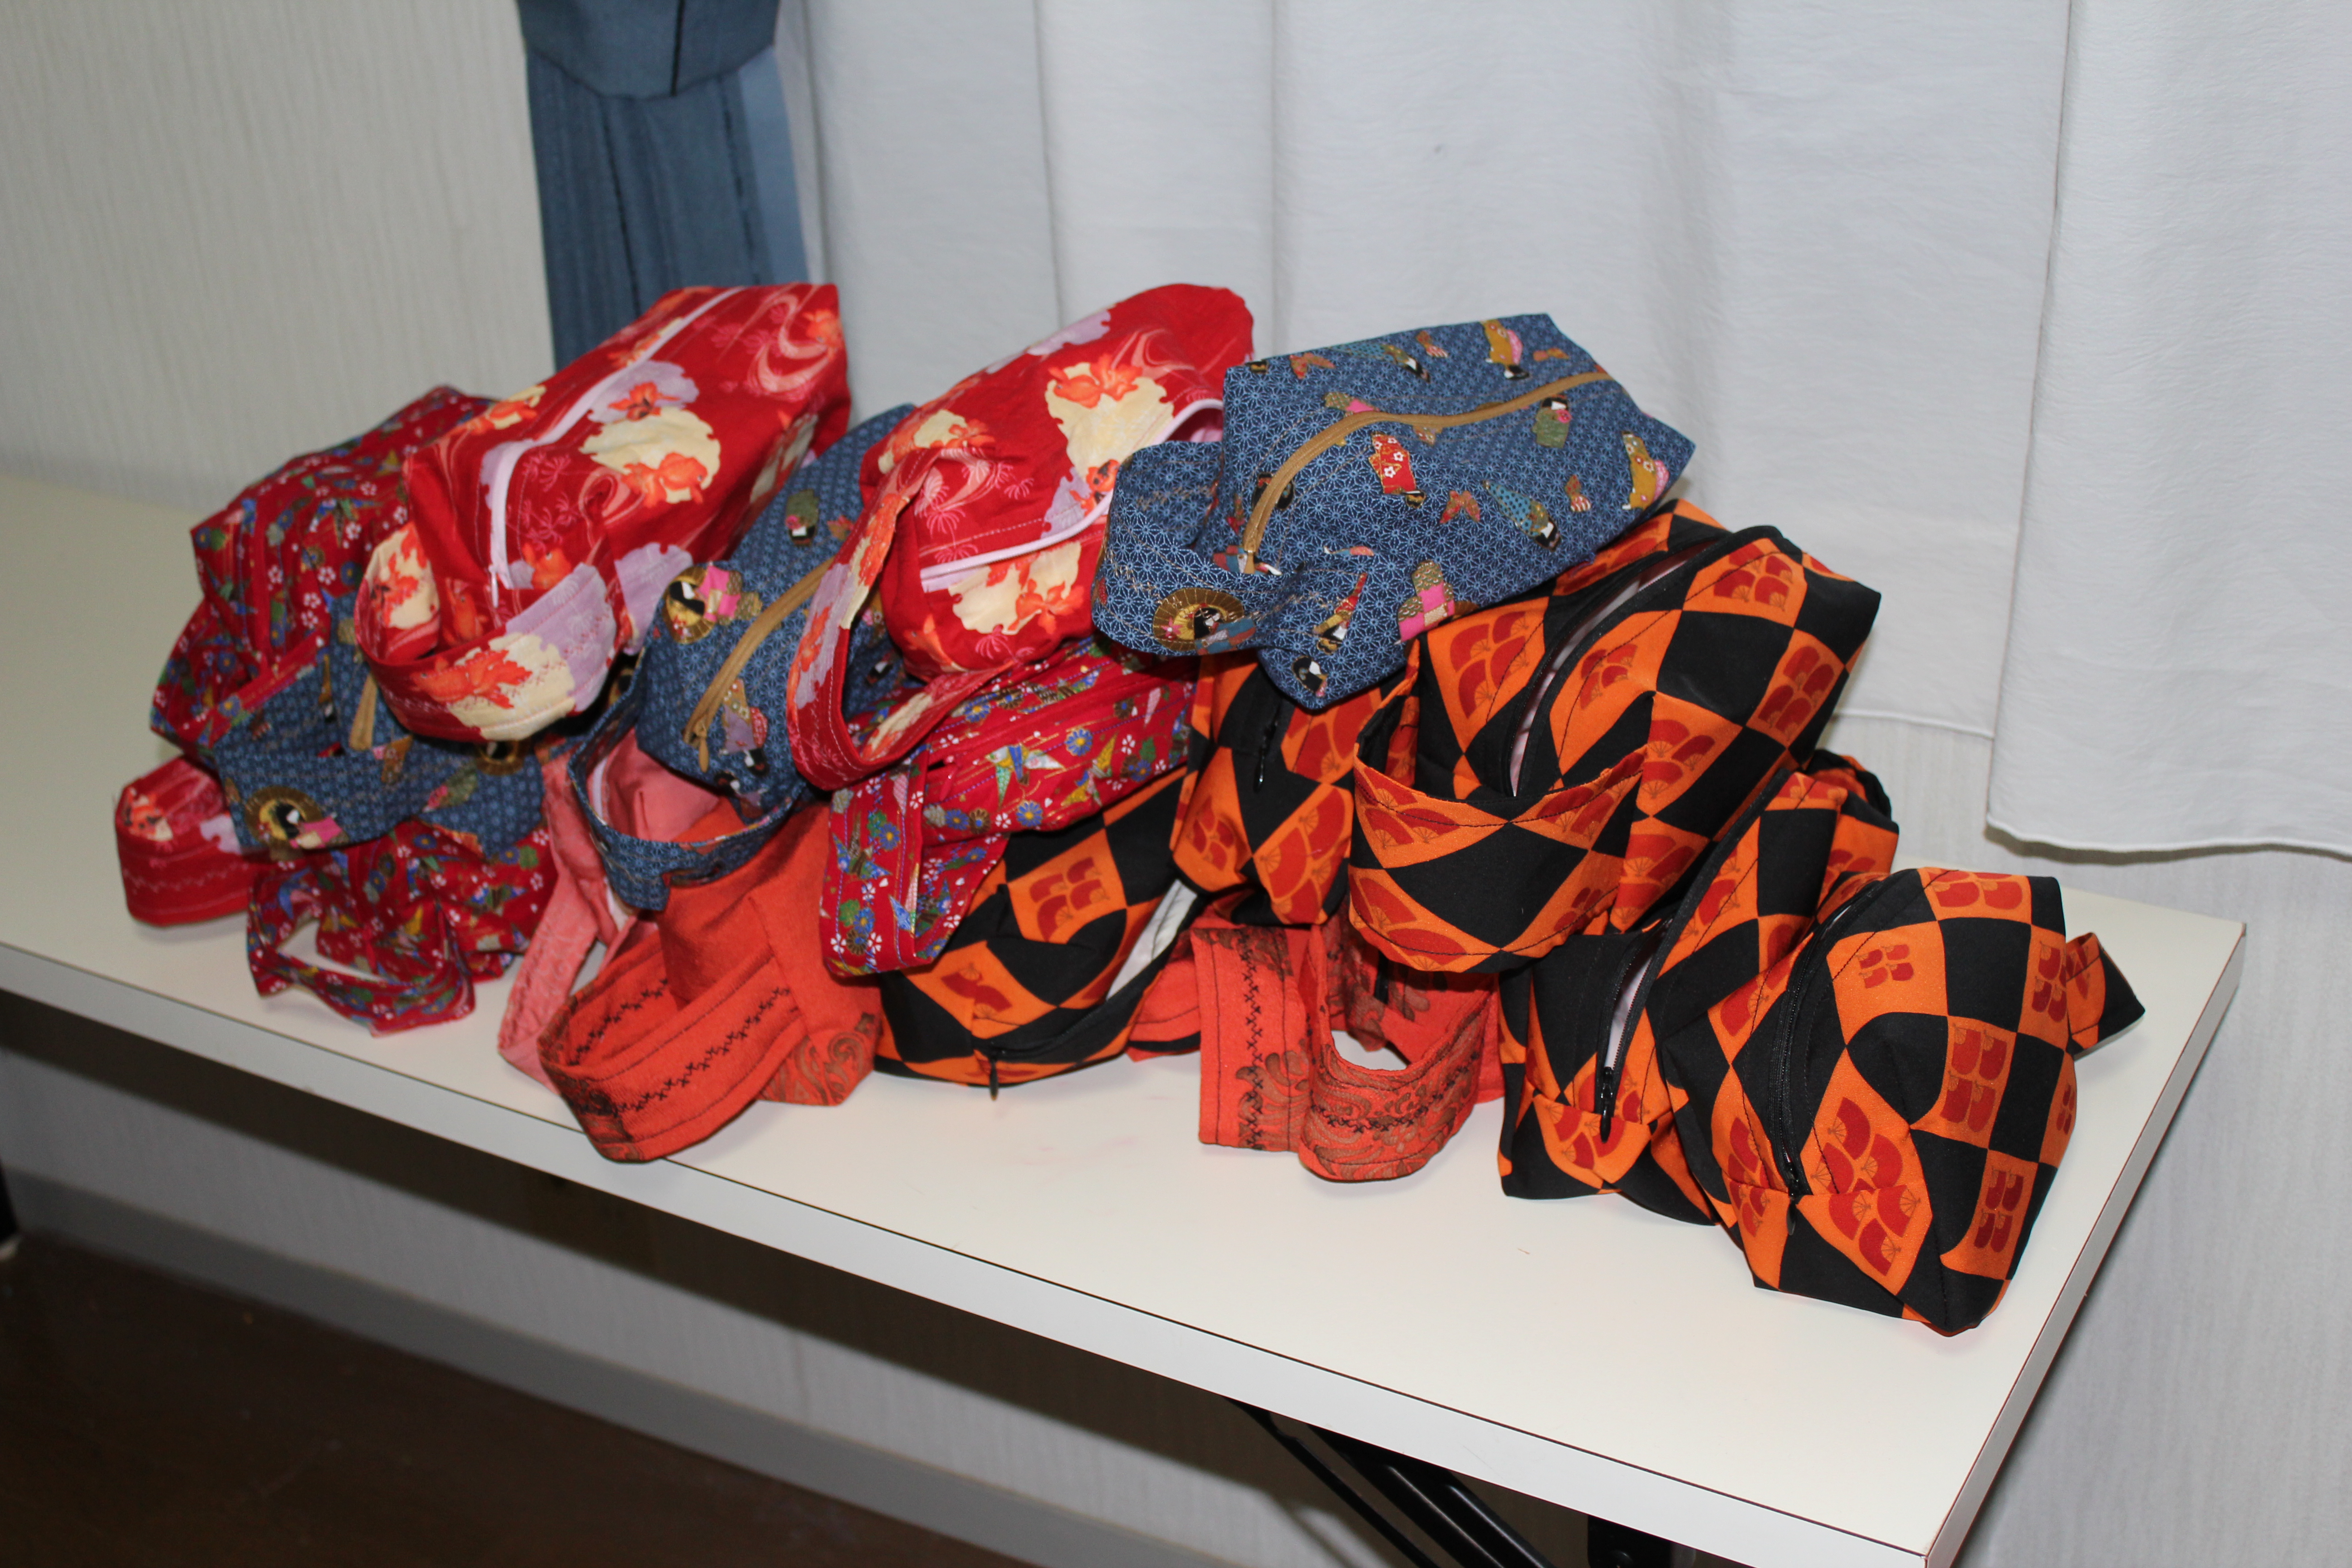
Voila, finished bags!
No comments:
Post a Comment
Thanks for taking the time to comment on my blog!