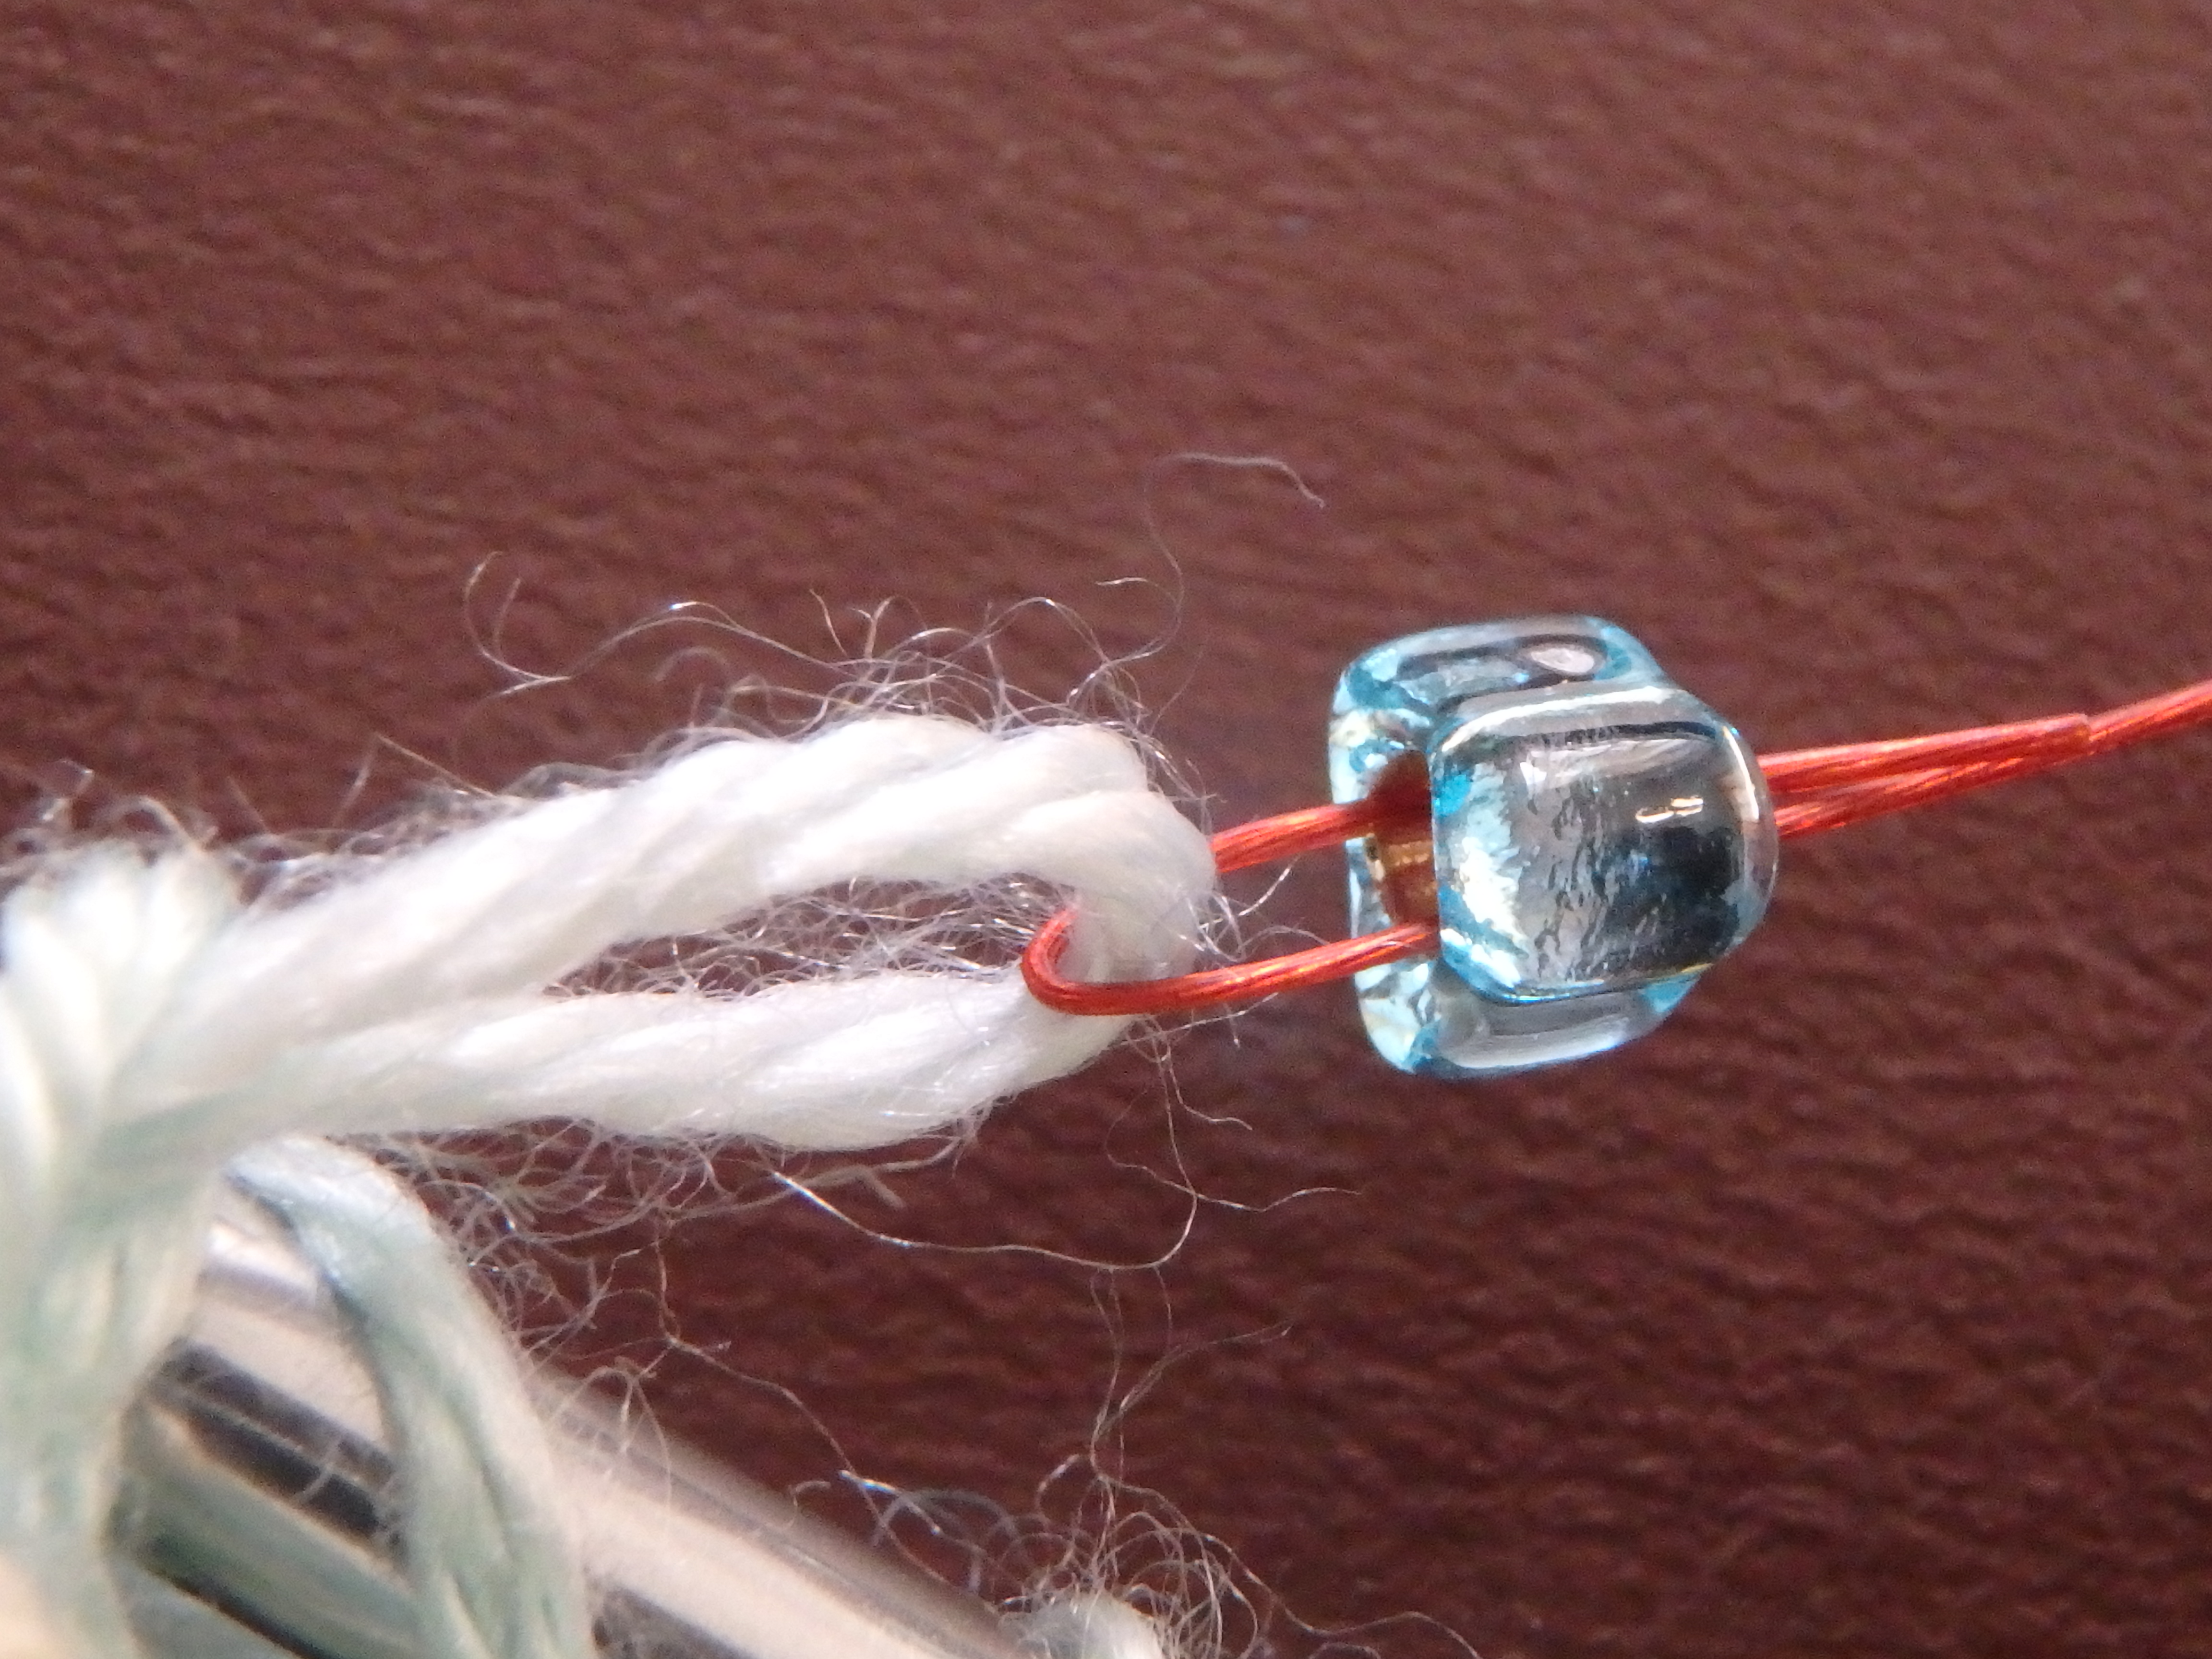
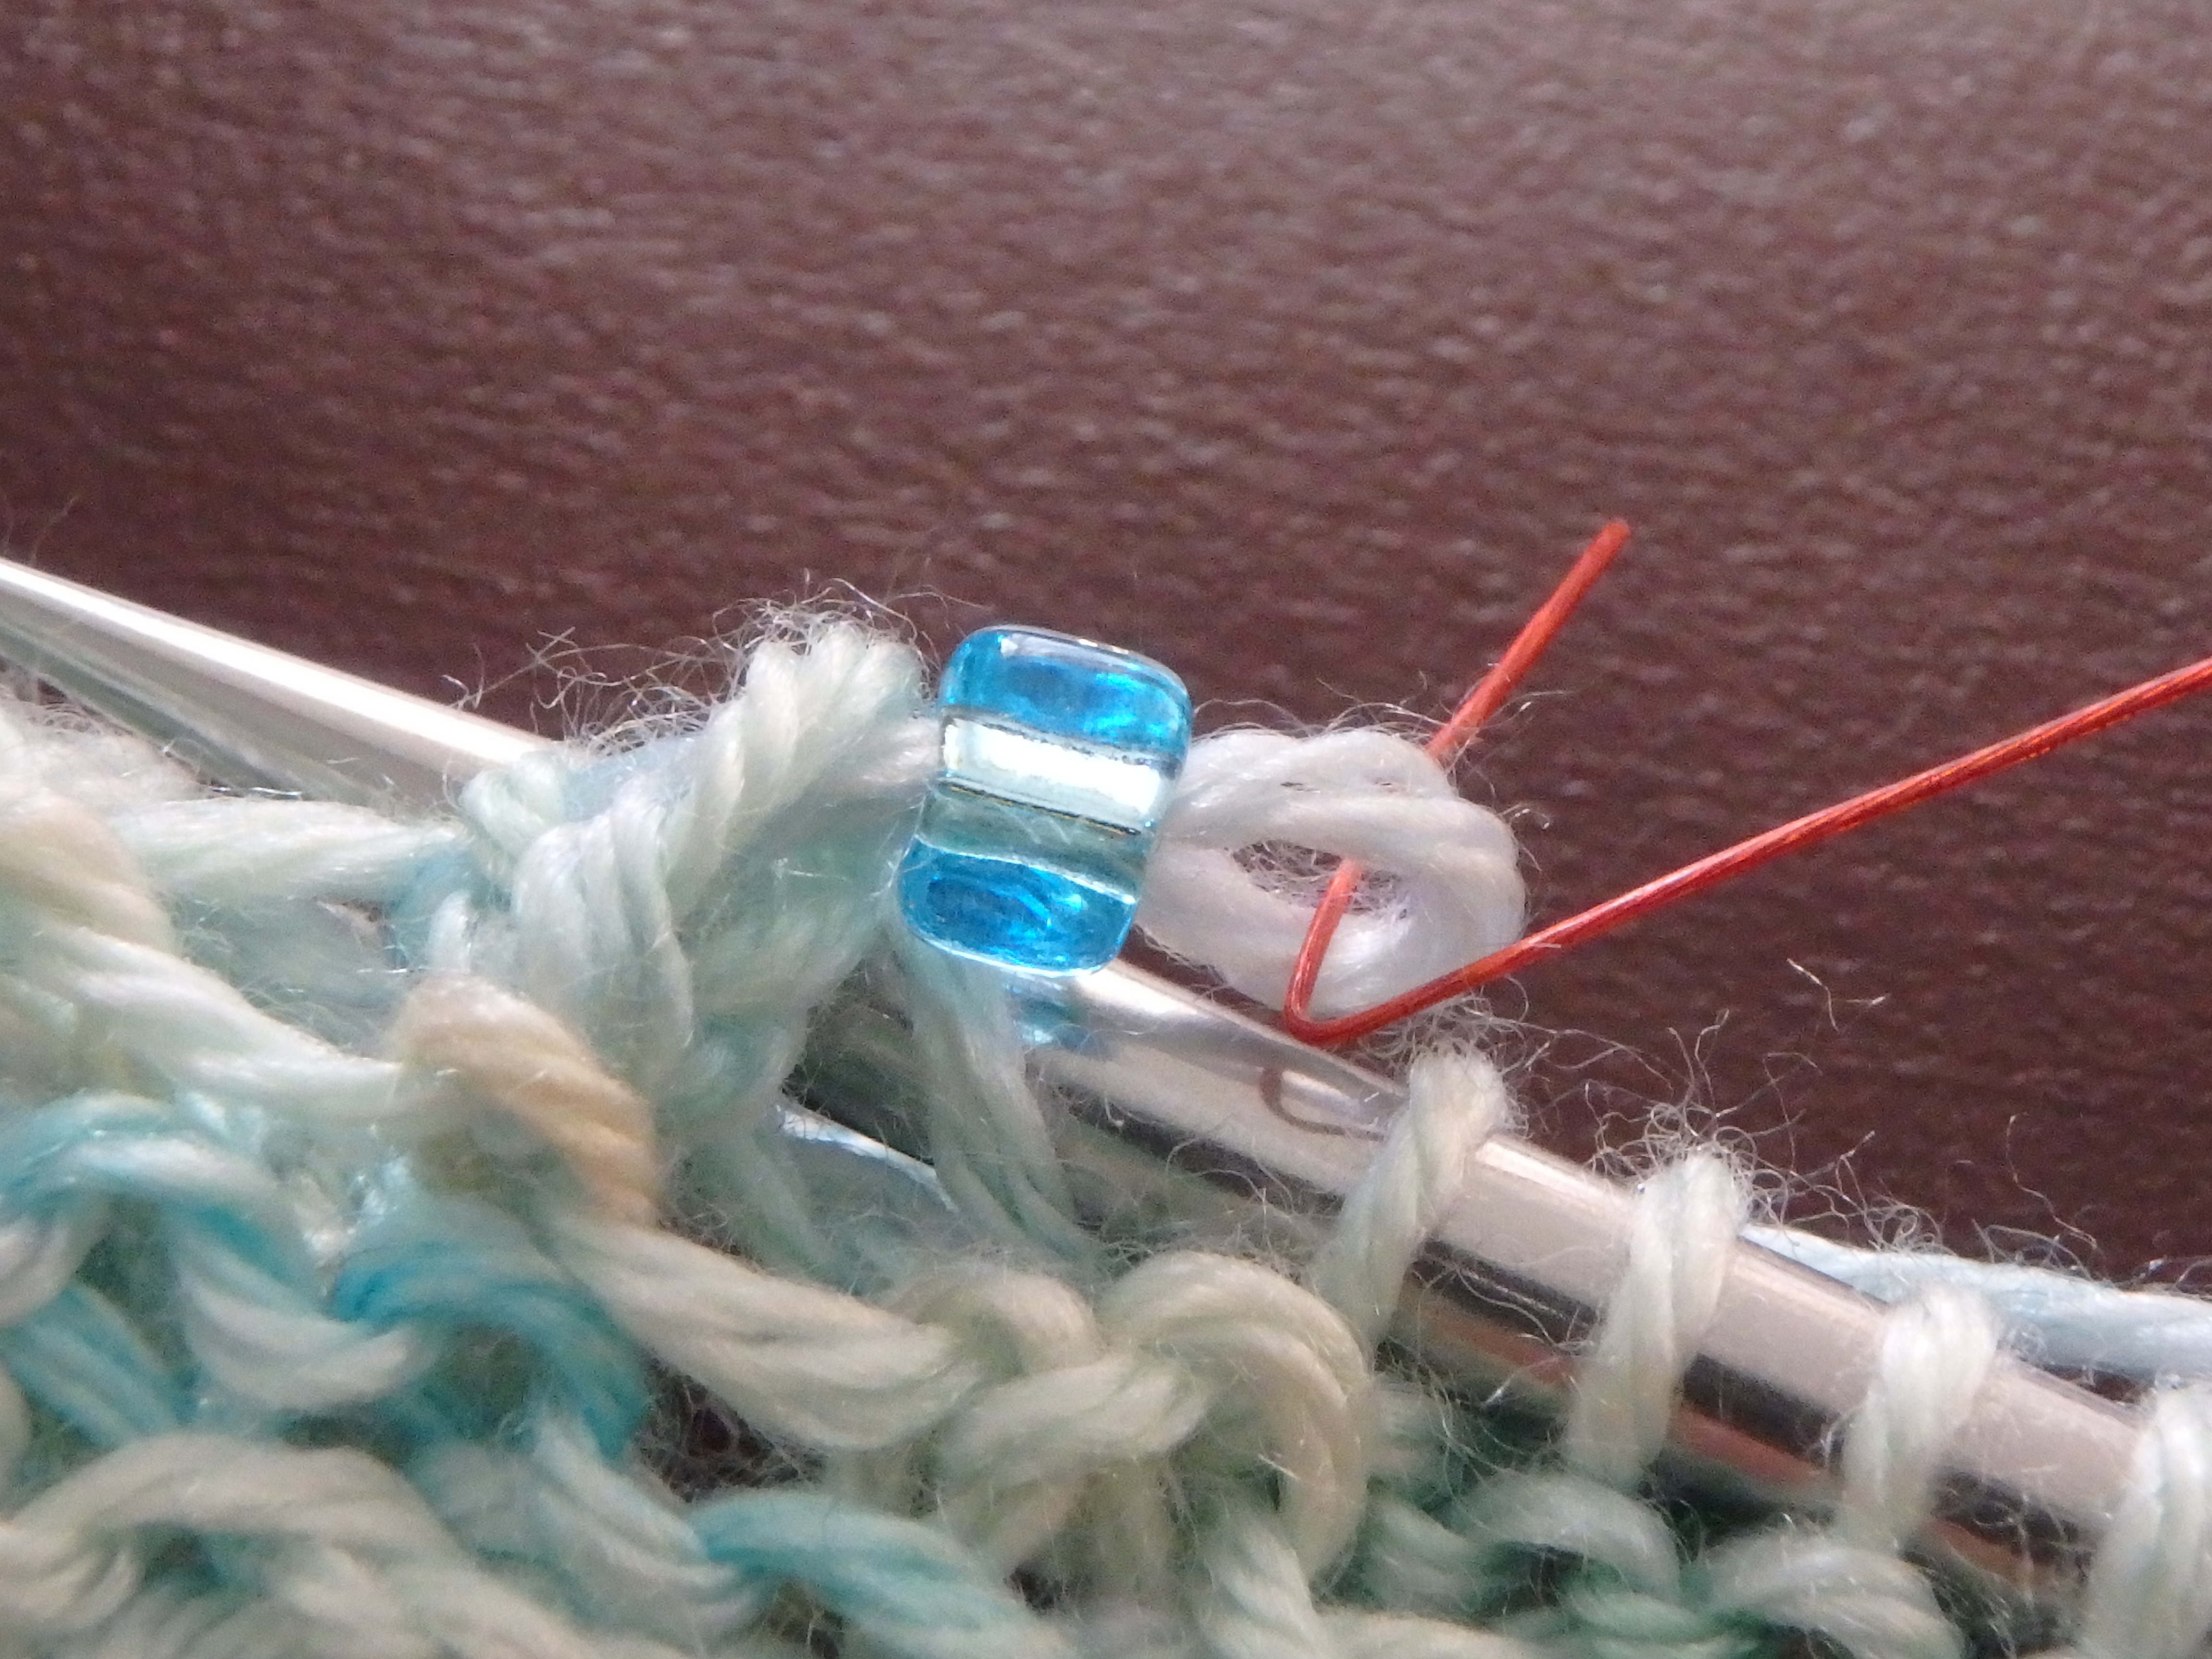
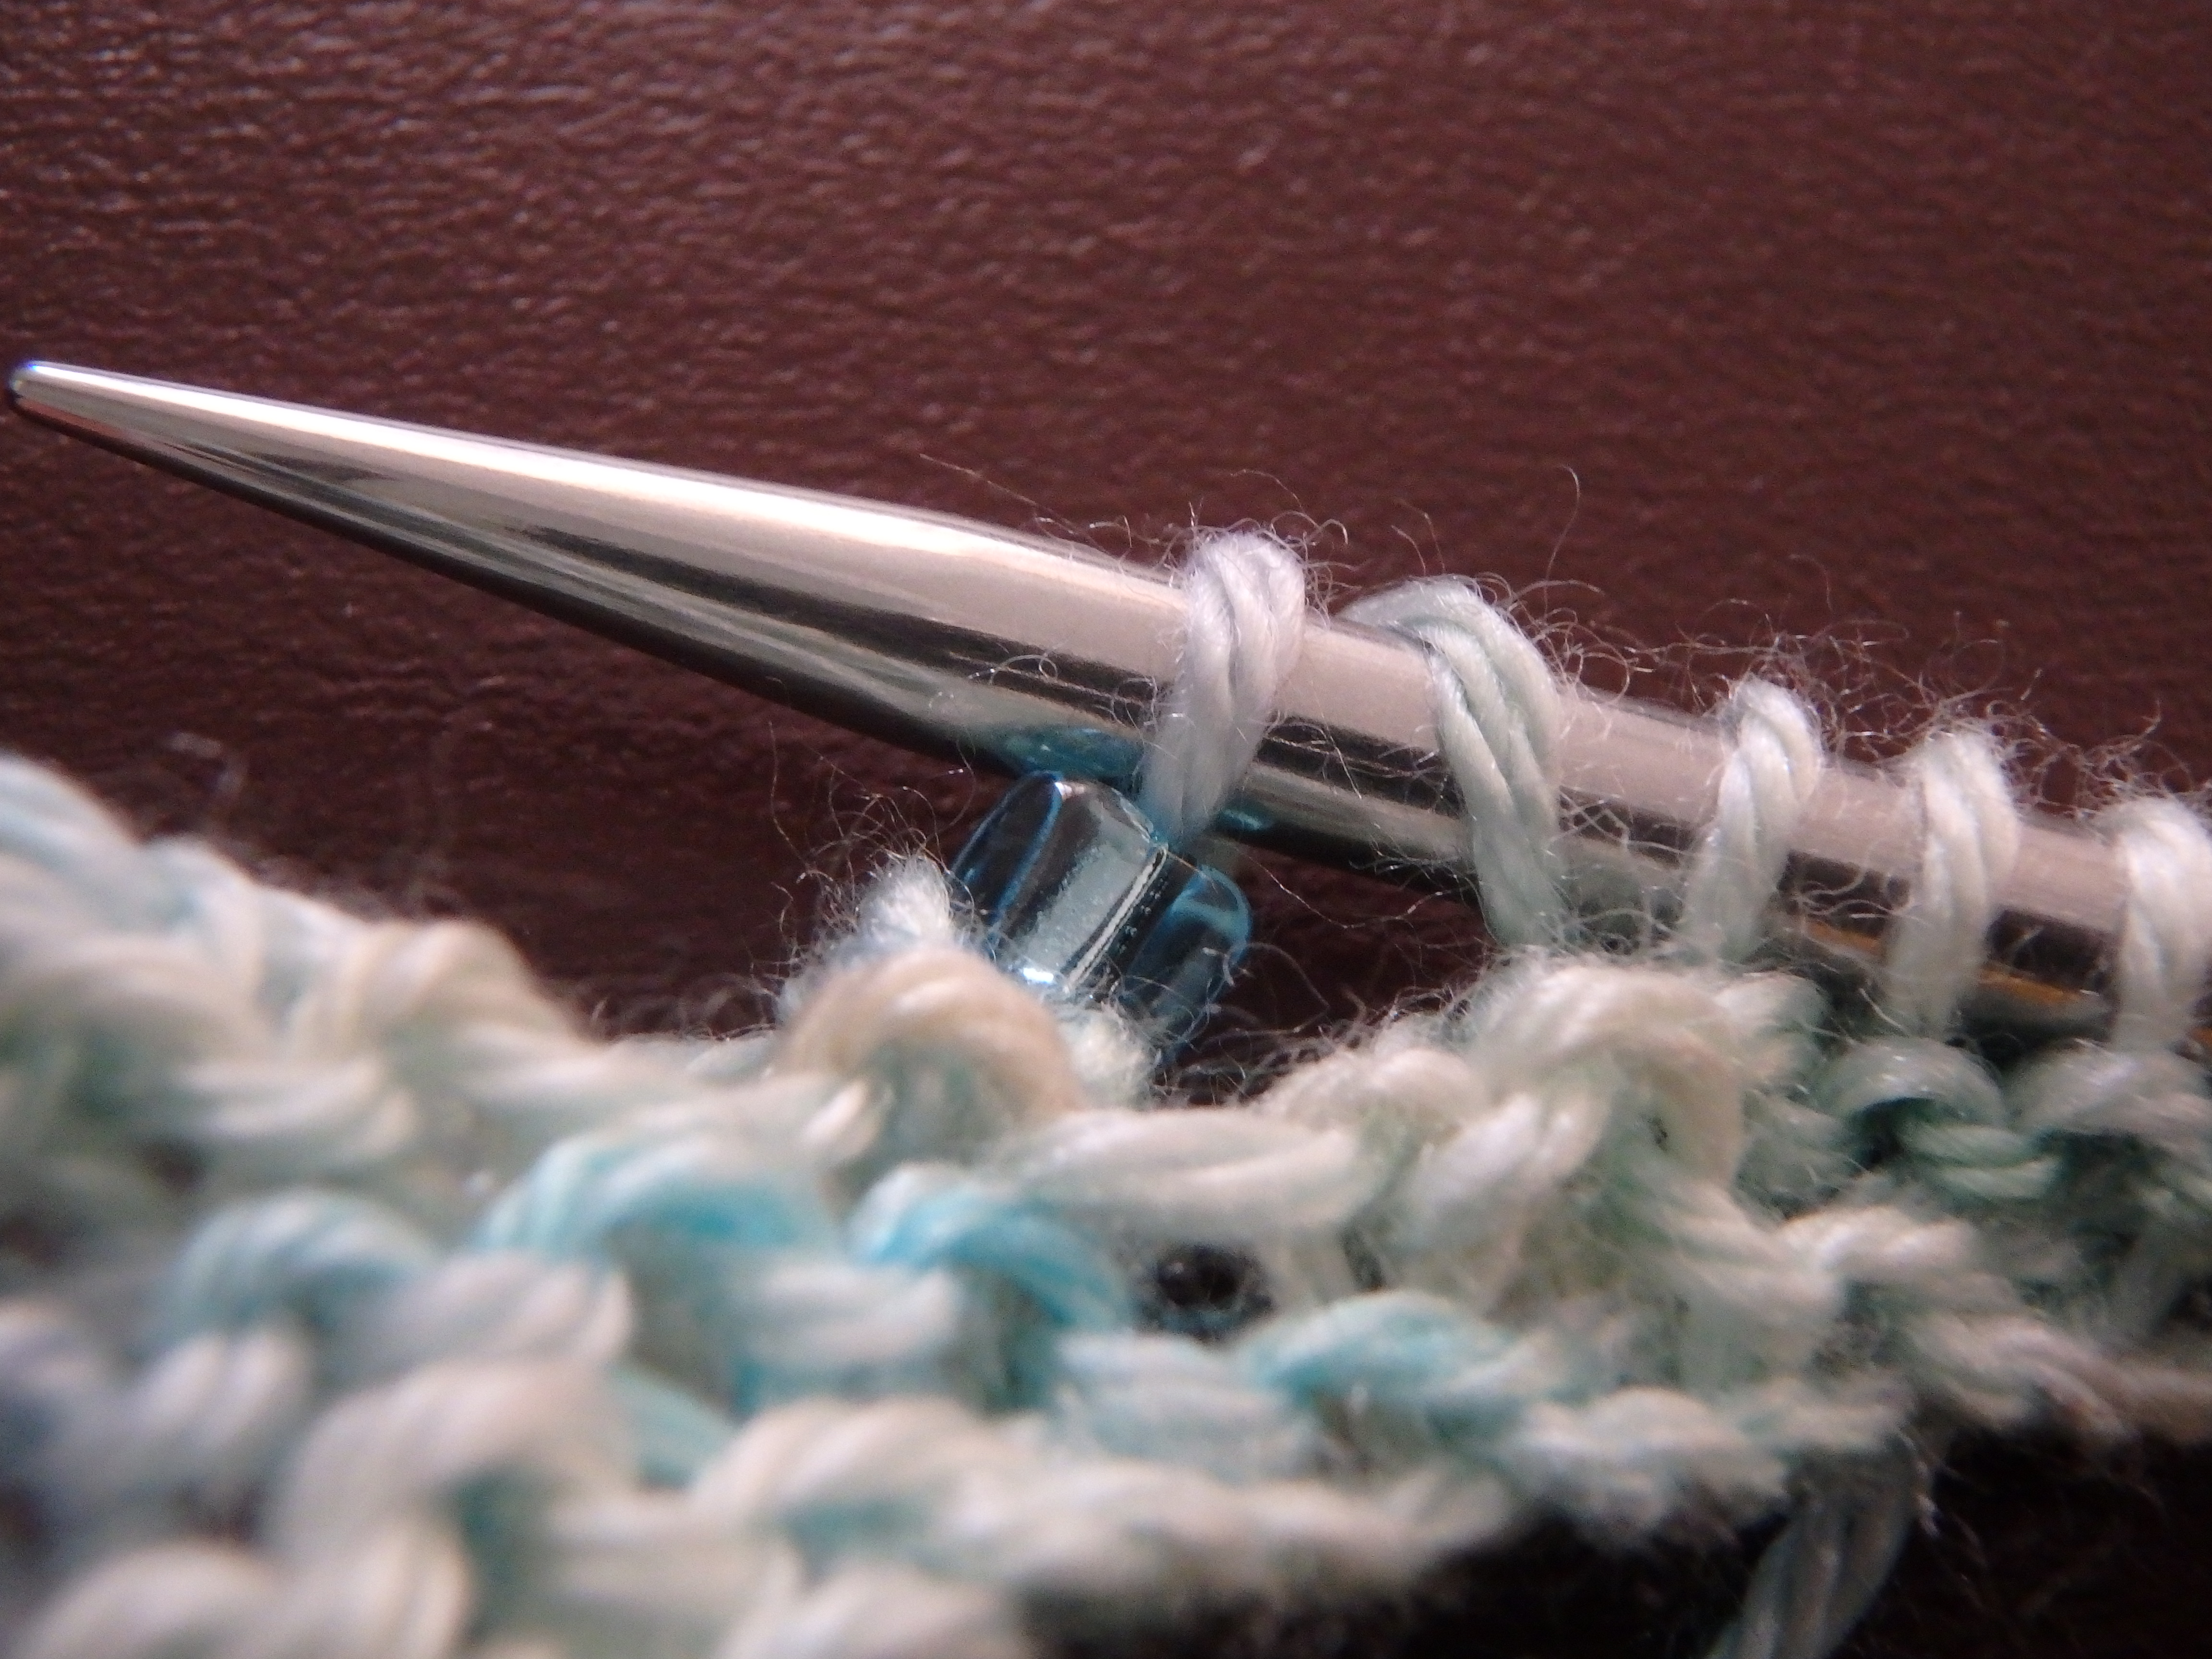
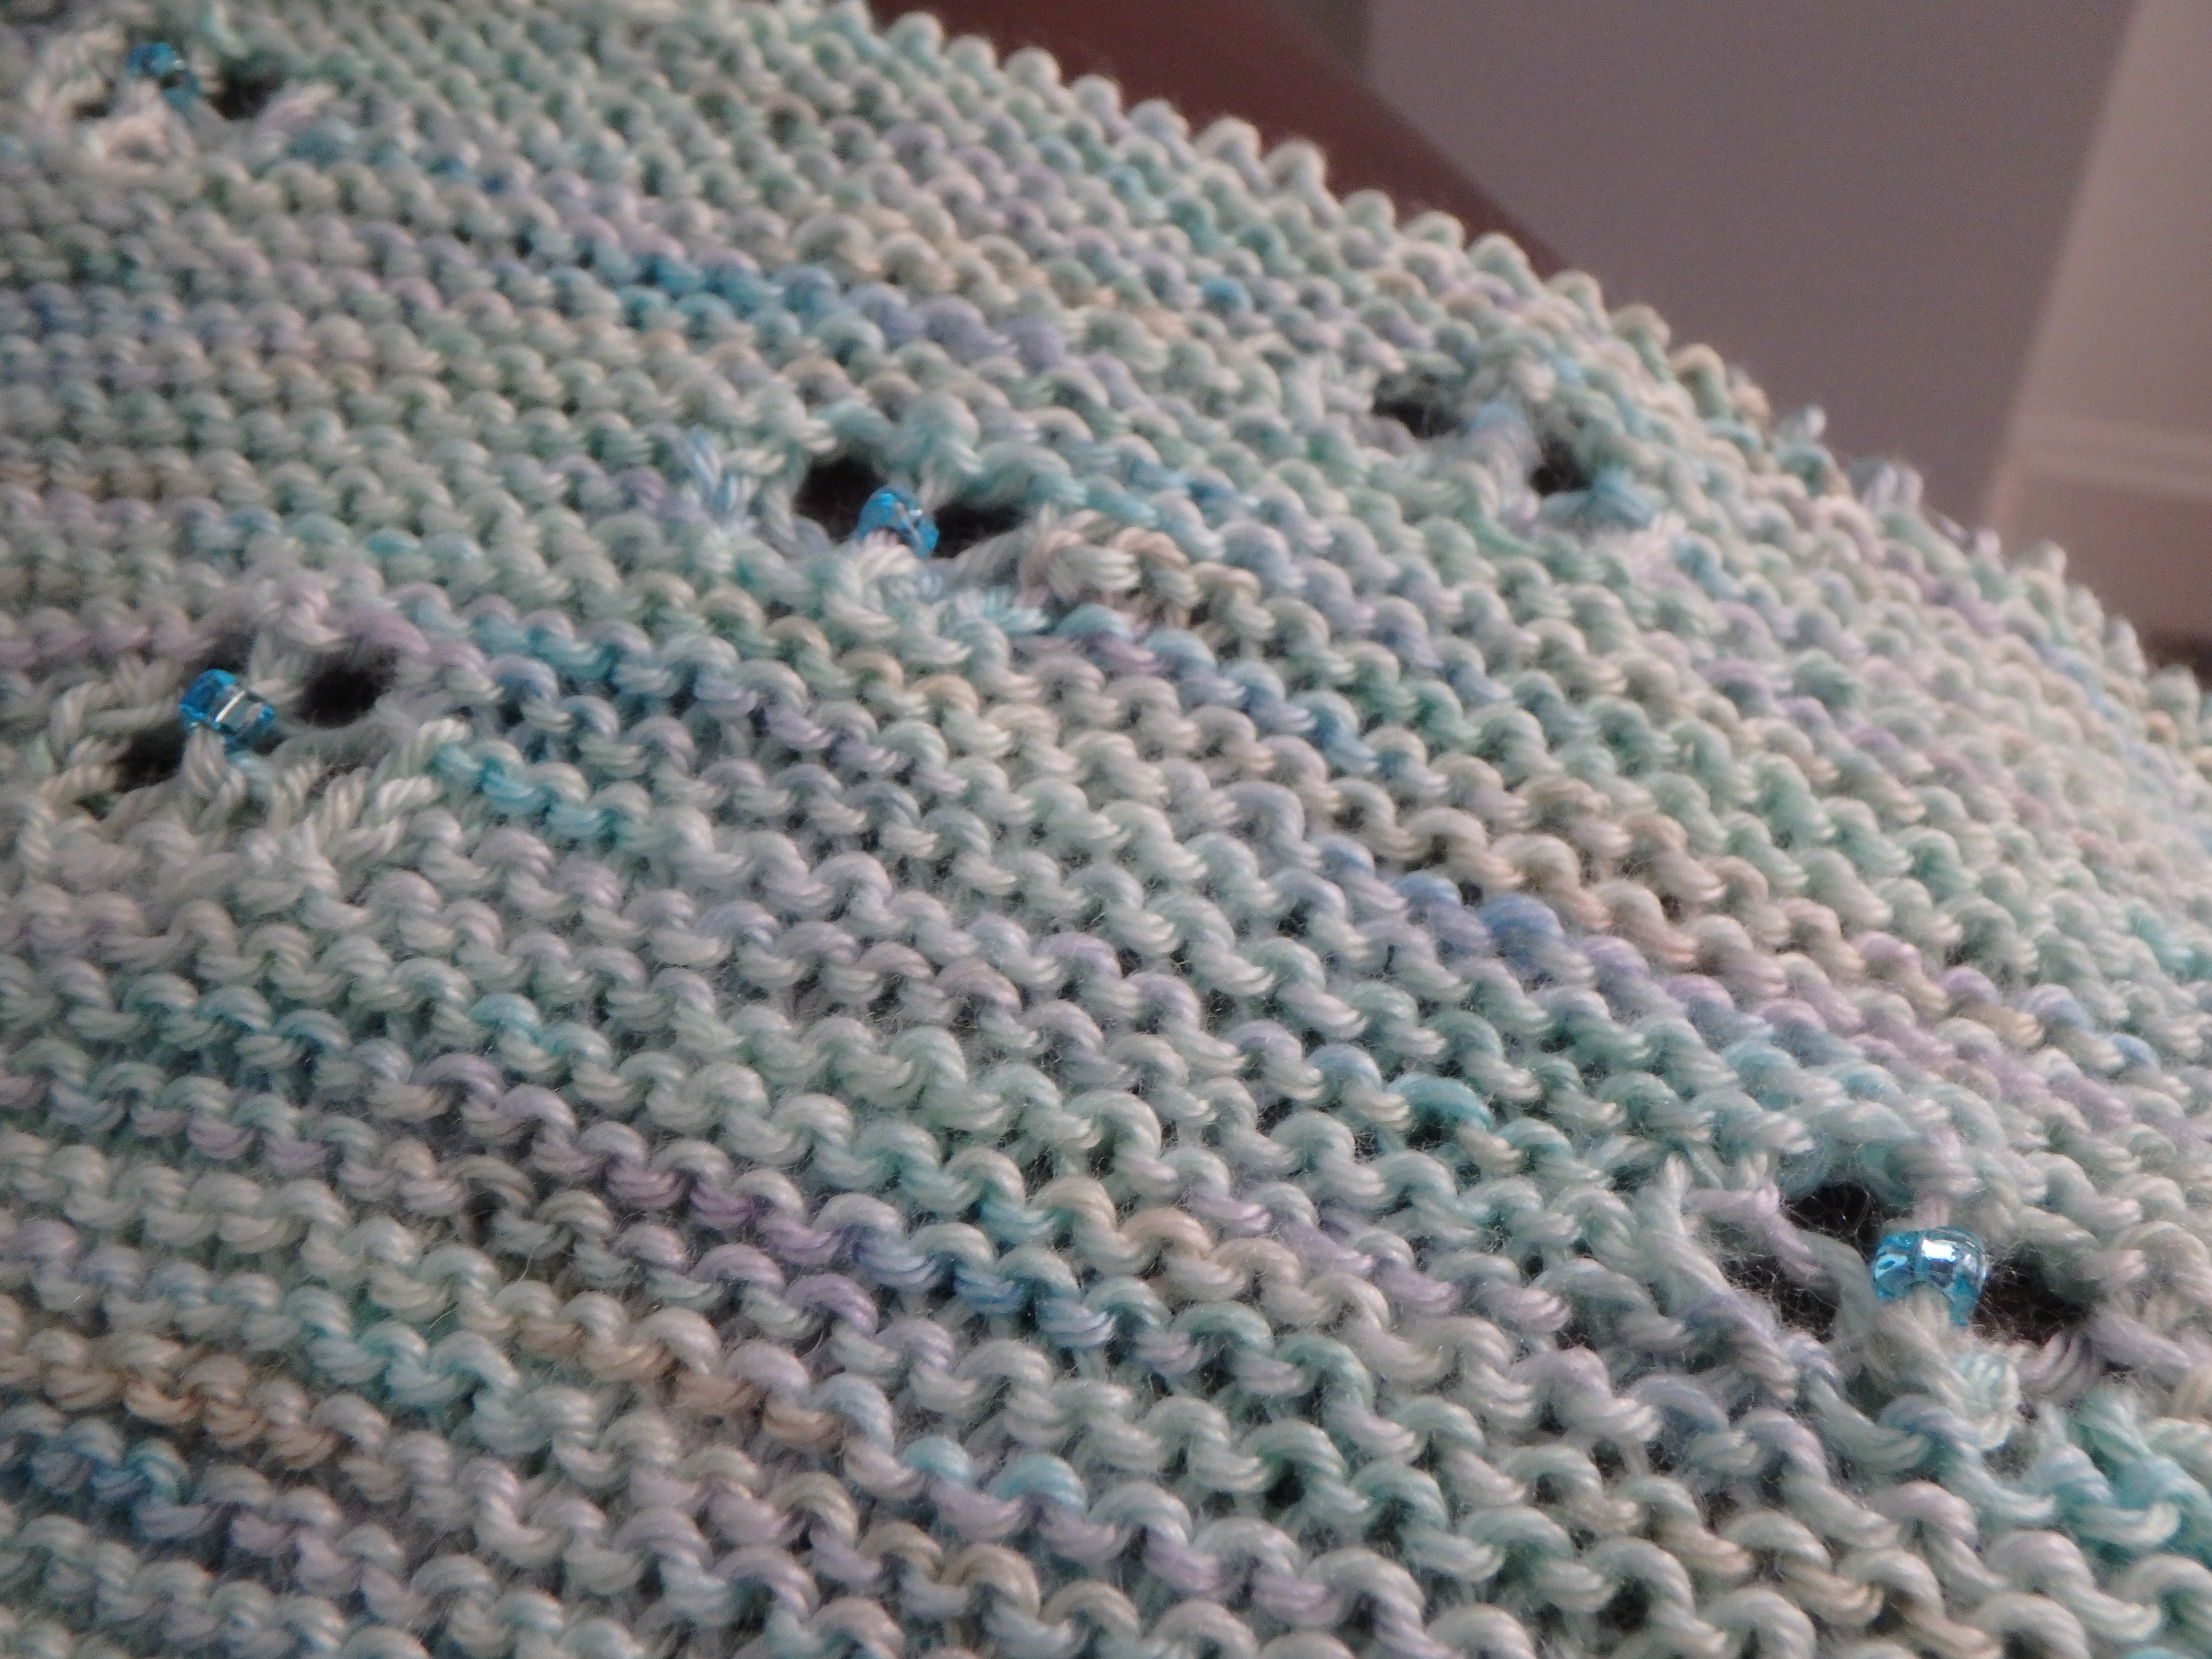
People have all sorts of different methods to put beads onto their knitting. There's the crochet hook method, get a tiny hook that will fit through the bead to hook it on, the Fleegle Beader, basically taking that crochet hook method and modifying it to make it easier to bead, using dental floss threaders, and my preferred way, using beading wire to slip the beads onto the stitches.
I like this method because it's cheap, it's easy, it attaches to your beading container, it allows you to count out the beads per row, and it's easy to fix if it breaks or gets a rough spot.
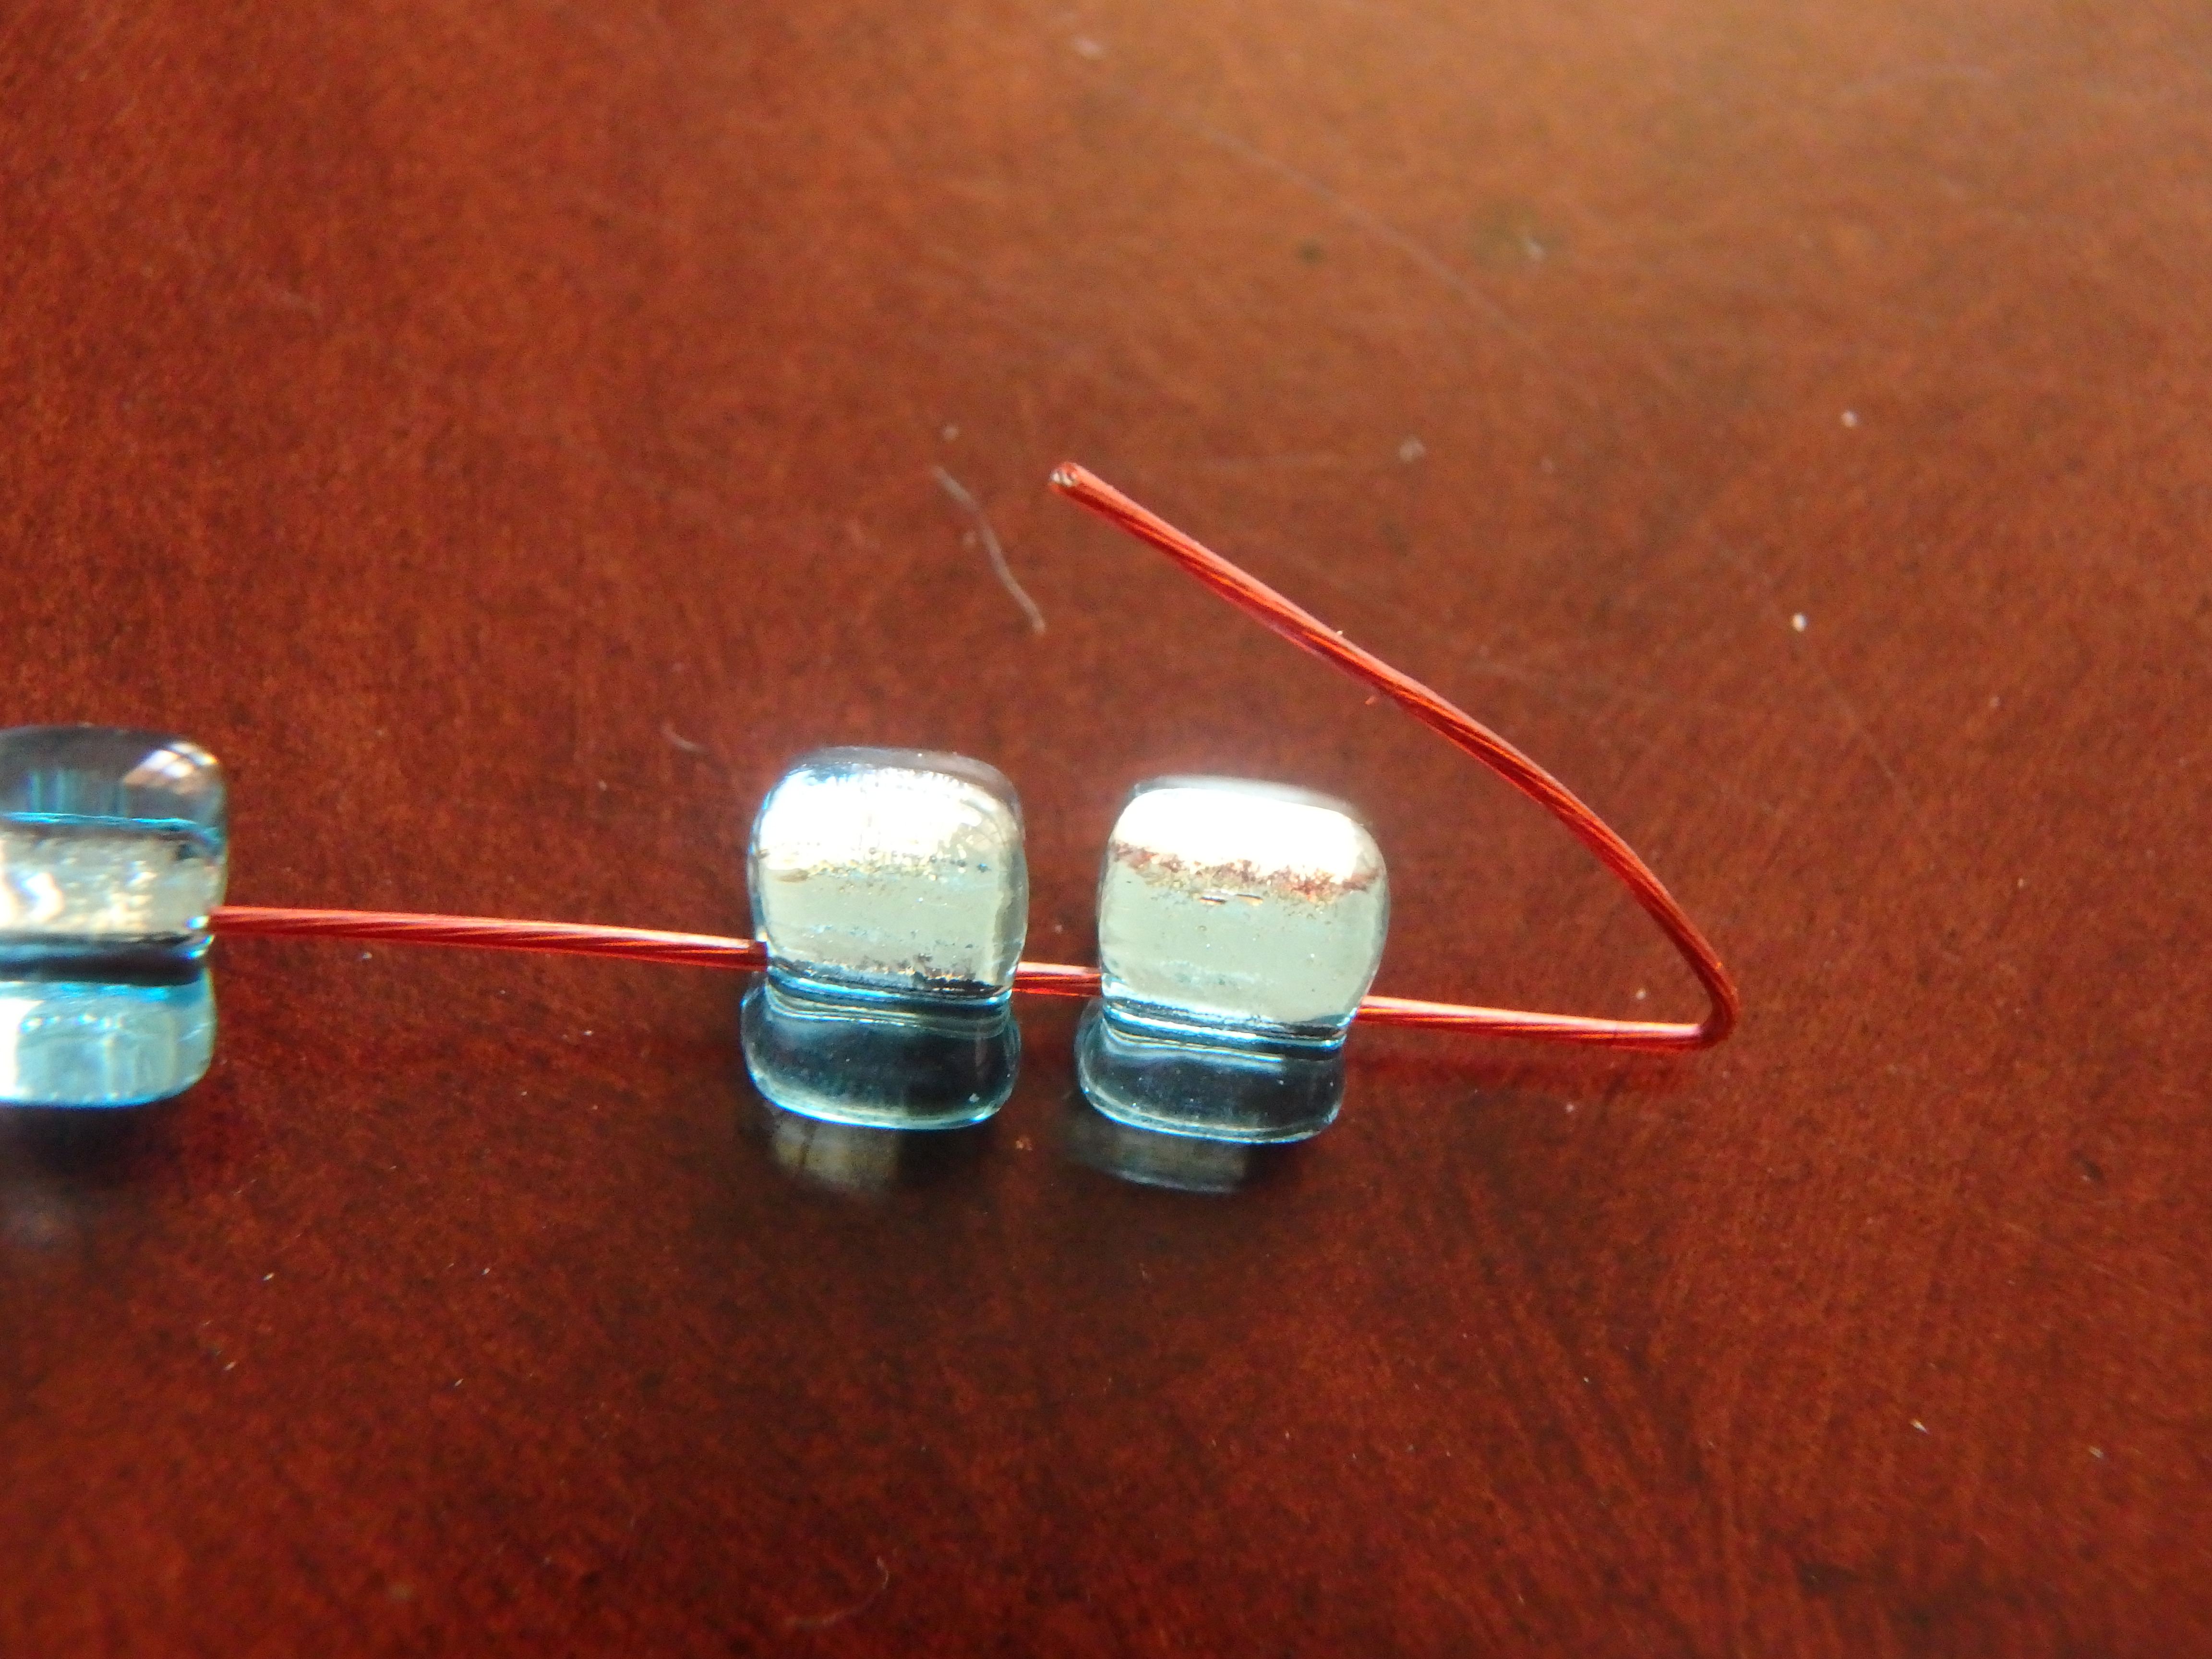
I get a strand of beading wire and attach it to the bead container, then bend the end into a hook.
I then put all the beads I need for a row onto the wire. That way I know I made a mistake somewhere if I run out or have beads left over at the end of the row.
To place the bead, I grab the loop of the stitch with the wire hook.
Then I close up the hook and slide the bead over it, down onto the stitch.
Once the bead is on the stitch, I put the stitch back onto the needle and keep going.
Simple, effective, and no difficulty getting a crochet hook into the bead or picking up the yarn!
Showing posts with label Techniques. Show all posts
Thursday, August 17, 2017
Tuesday, May 23, 2017
The Eyes Have It
Rather than trying to position plastic eyes correctly, I've been making needle felted eyes for my more recent stuffed creatures. I tried finding a tutorial for someone recently but didn't see one, so decided to make my own since I was about to needle felt the eyes onto the purple mystery pig.
Step 1: Gather Supplies. In this case, it's the object to needle felt onto and some lengths of scrap wool to felt. The object can be any sort of fiber but the felting scraps should be wool. Make your scraps fairly generous for the area you want to cover, you can almost always felt it in tighter and smaller.
Step 2: Starting Point. Begin to tack down the center color (pupil, whole eye, whatever you're doing) where you want it.
Step 3: Coil Around. Wind the yarn around the starting point and felt it down. Keep winding and felting to cover the area you'd like covered.
Step 4: Next Color. Do the same steps of tacking down the beginning, then coiling the yarn where you want it and needle felting it in for any additional colors you're using (iris, white, eyelashes, etc.).
You can make the areas as fluffy or as tight as you want by tacking down only a little bit along the yarn scraps or fully felting it down. The eye on the left is lightly tacked down while the one on the right has been more vigorously felted.
One of the nice things about starting with yarn scraps is that you can more easily make straight lines with the yarn where you want it to be. As long as the yarn scraps are wool or something that will felt, you're good to go! You can also do fun things like felt down one side of a piece of yarn and brush out the plies to make eyelashes or other hair-like things.
Et voila!
Step 1: Gather Supplies. In this case, it's the object to needle felt onto and some lengths of scrap wool to felt. The object can be any sort of fiber but the felting scraps should be wool. Make your scraps fairly generous for the area you want to cover, you can almost always felt it in tighter and smaller.
Step 2: Starting Point. Begin to tack down the center color (pupil, whole eye, whatever you're doing) where you want it.
Step 3: Coil Around. Wind the yarn around the starting point and felt it down. Keep winding and felting to cover the area you'd like covered.
Step 4: Next Color. Do the same steps of tacking down the beginning, then coiling the yarn where you want it and needle felting it in for any additional colors you're using (iris, white, eyelashes, etc.).
You can make the areas as fluffy or as tight as you want by tacking down only a little bit along the yarn scraps or fully felting it down. The eye on the left is lightly tacked down while the one on the right has been more vigorously felted.
One of the nice things about starting with yarn scraps is that you can more easily make straight lines with the yarn where you want it to be. As long as the yarn scraps are wool or something that will felt, you're good to go! You can also do fun things like felt down one side of a piece of yarn and brush out the plies to make eyelashes or other hair-like things.
Et voila!
Friday, July 6, 2007
Necessity Is The Mother of Invention
I participated in Sock Wars last year. It was a lot of fun. I really liked the socks I sent, not so much the socks I received. I had almost enough yarn left over from the two skeins I used for another pair of socks. What I really wanted was burgundy on the ribbed portion, black on the stockinette portion, heel, and cuff. I did not have that much burgundy. So, I did both legs up until the heel. Yippee, enough burgundy for both and enough for a small pattern of decreasing down into the foot. Go me. Next problem: There is only enough black to completely finish one sock. To the point where I didn't actually kitchener the last two stitches because I did not have enough yarn left. So, more black yarn is in the Great Yarn Order.
I did finish a pair of socks this week! See:

What? To be a pair of socks they have to be the same color? Or at least the same pattern? Okay, you got me there. The first sock is the Sock of Doom pattern that I was talking about in the first paragraph. I did not float the strands for the burgundy stripes loose enough, so it has a bit of a pucker where the burgundy meets the black. Not terrible. It just needs to stretch too much to get on my foot!
Although black yarn never looks quite right on film, here's a decent picture of the second sock:

It's the Hourglass Eyelet pattern from MagKnits. I used one skein of Digit fingering weight yarn from Nancy's Knit Knacks. In fact, I didn't even do the last decrease row of the toe decreases so as to keep it to one skein. I also made a pair of Baudelaires using this yarn. I hate normal work socks, so the goal was to make a week's worth of work socks. I had two pairs, Hedera using KnitPicks Essentials in black, and the Baudelairs. Those got accidentally thrown into the wash a couple of weeks ago, so now my 8 year old sister is getting a pair of socks for her birthday. Which isn't too bad, as I liked the fit and feel of the socks, I just didn't like how they looked in black.
About five minutes after I took this picture (which was about ten minutes after I finished the Hourglass Eyelet sock) I found a nail that sticks up from the entryway into the kitchen. Or rather, the Hourglass Eyelet sock found it, by snagging and ripping. I fixed it best I could, but it's quite annoying that I couldn't even wear the socks for real before causing damage.
One major plus for the last couple inches of the Hourglass Eyelet pattern was that I learned a new technique for SSK. Slip the first stitch knitwise, the second purlwise, and the SSK sits nice and flat, just about as nice as the K2tog. That is the one stitch that's been really bothering me whenever I use it, and now it's all kinds of nice. Yippee! I actually learned this one from one of the special notices from Mystery Stole 3. I love the online knitting community, I get to learn something new every day!
I did finish a pair of socks this week! See:

What? To be a pair of socks they have to be the same color? Or at least the same pattern? Okay, you got me there. The first sock is the Sock of Doom pattern that I was talking about in the first paragraph. I did not float the strands for the burgundy stripes loose enough, so it has a bit of a pucker where the burgundy meets the black. Not terrible. It just needs to stretch too much to get on my foot!
Although black yarn never looks quite right on film, here's a decent picture of the second sock:

It's the Hourglass Eyelet pattern from MagKnits. I used one skein of Digit fingering weight yarn from Nancy's Knit Knacks. In fact, I didn't even do the last decrease row of the toe decreases so as to keep it to one skein. I also made a pair of Baudelaires using this yarn. I hate normal work socks, so the goal was to make a week's worth of work socks. I had two pairs, Hedera using KnitPicks Essentials in black, and the Baudelairs. Those got accidentally thrown into the wash a couple of weeks ago, so now my 8 year old sister is getting a pair of socks for her birthday. Which isn't too bad, as I liked the fit and feel of the socks, I just didn't like how they looked in black.
About five minutes after I took this picture (which was about ten minutes after I finished the Hourglass Eyelet sock) I found a nail that sticks up from the entryway into the kitchen. Or rather, the Hourglass Eyelet sock found it, by snagging and ripping. I fixed it best I could, but it's quite annoying that I couldn't even wear the socks for real before causing damage.
One major plus for the last couple inches of the Hourglass Eyelet pattern was that I learned a new technique for SSK. Slip the first stitch knitwise, the second purlwise, and the SSK sits nice and flat, just about as nice as the K2tog. That is the one stitch that's been really bothering me whenever I use it, and now it's all kinds of nice. Yippee! I actually learned this one from one of the special notices from Mystery Stole 3. I love the online knitting community, I get to learn something new every day!
Labels:
Hourglass Eyelet socks,
Socks of Doom,
Techniques
Subscribe to:
Posts (Atom)