Wednesday, January 23, 2013

Sierpinski Carpet Blanket (Finally!)

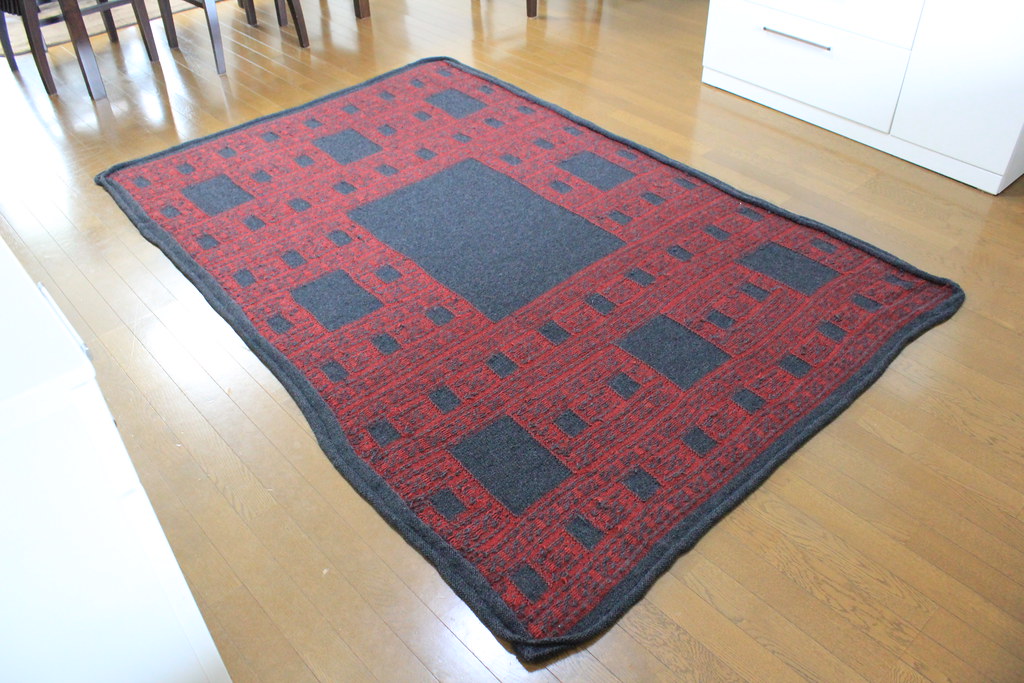
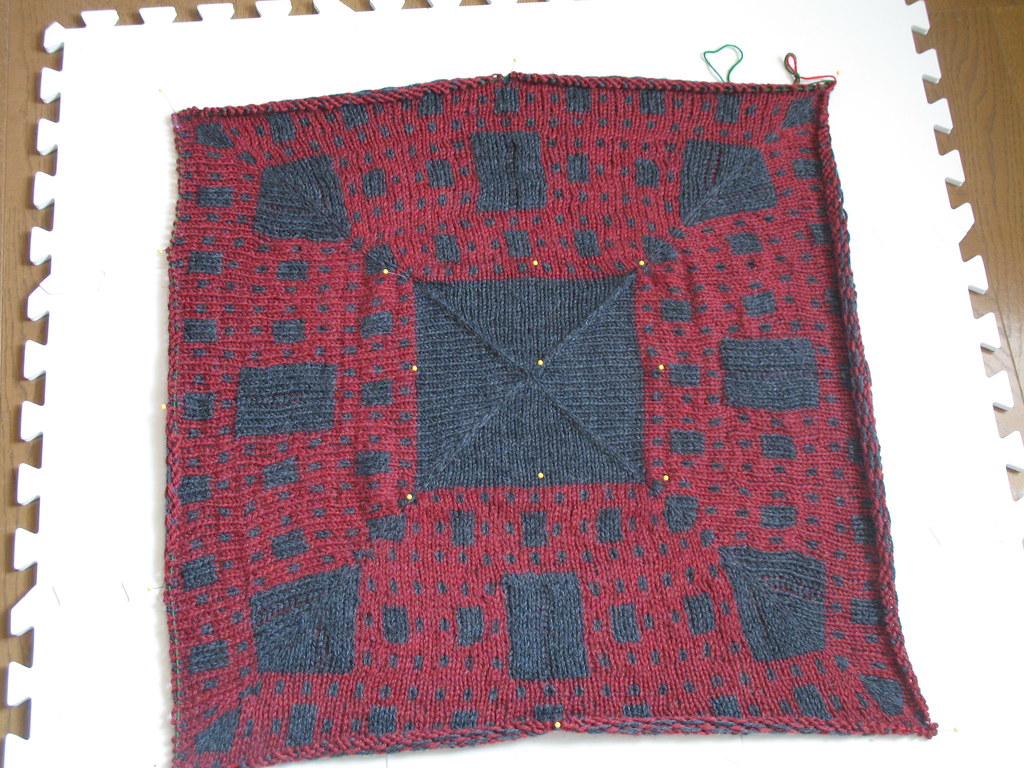
Motivated by this blog post and wanting to keep up my every-other-day posting, I am finally going to show off the labor of love that was the Sierpinski Carpet Blanket. This thing took FOREVER (first posted about it February of 2010, finished July 29, 2011) and was a mix of intarsia and stranded knitting. I've already blogged much of the saga, but here's the full story with links to previous posts where appropriate. I thought the idea of a Sierpinski Carpet as a queen-sized blanket would be an excellent wedding gift for some equally geek-tastic friends, so first started with a mitered square version:


The pattern was simple, as the Sierpinski Carpet pattern is quite easy, and the plan was eight of these mitered squares around a solid colored center mitered square. As you can see, the corner squares weren't exactly square. Okay, start again.

For the second attempt, I decided to just knit the whole thing in one go using intarsia and stranding to get the design I wanted. I figured that while separate squares might be easier to work on piece by piece, I know I hate seaming and the final product would look better as one solid piece. Additionally, since I'd be stranding anyway, making it in separate pieces wouldn't make the actual work any easier. Having over 40 bits of yarn going at once was a bit much, but I still managed to make it work and finally, nearing their one-year anniversary, I finished the blanket:


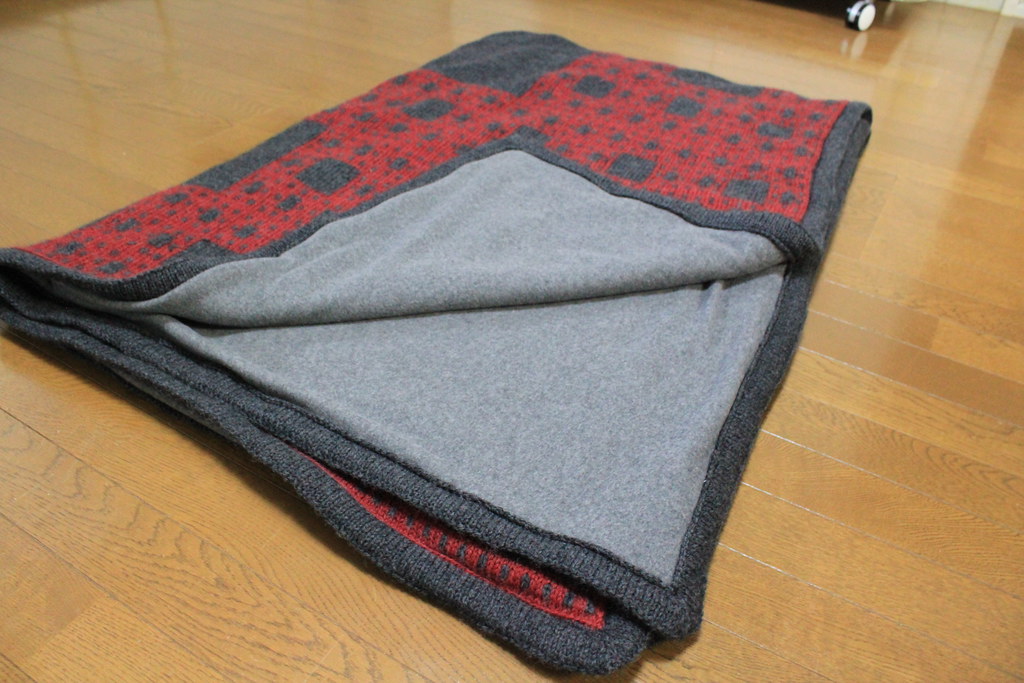
Backside glamor shot:


The border is a double border, mitered in the corners and folding over to the back as you can see in the last picture. This is so I could put a soft felt backing on it. The backing serves multiple purposes, keeping the floats from getting snagged and messing up the blanket, covering up the wrong side of the work, and giving a much softer side for cuddling under. The wool was a fairly scratchy yarn and should be quite warm, but isn't something most people would want next to their skin. After I sewed on the backing, it looked quite professional and finished. Some people apparently don't believe that it's handmade, and I've been told that at least one person scoured the blanket trying to figure out where I took the tag off to prove it wasn't handmade. I must say, that makes me quite proud of my work!


Pattern: None (Ravelry)
Yarn: Nikke Victor Shetland 9, a yarn I got in Japan during their New Year's sale.
Needles: US9/5.5mm
Timeframe: February 13, 2010 - July 29, 2011
Mods: None, it was my own pattern.
Problems: See above!

Monday, January 21, 2013

Non-Thuja Socks of 2012

I finished a few pairs of socks I didn't blog about in 2012 (and one in December of 2011, but close enough). Two for me, one that is just for decoration, one for my husband, and my Mother-in-Law's yearly Christmas pair. I did not make any pairs of socks for me, start-to-finish, in 2012, and that's one of the things I'm planning to remedy this year. I have miles (and miles, and miles...) of sock yarn and many patterns chosen, but not that many pairs of handmade socks in my sock drawer to wear. I'll be keeping some mostly-stockinette socks as my easy, pay-no-attention project until I have at least four pairs knit. I did finish some socks I started in 2011, and here they are:

Three of these pairs of socks were done as test knits, all for Gardiner Yarn Works' excellent book, Indie Socks. The first one ended up being a gorgeous sock, but due to my feet being oddly proportioned, it's destined to be a single sock, used as a decoration or maybe a stocking for a small creature. I'm happy with it as a decoration, and while I would be happier with a pair I could wear, this pattern takes a lot of time and effort, sometimes having up to four colors in a single row! I also nearly lost this sock when I accidentally left it in a train station in Tokyo, right before I was leaving Tokyo to go back to Kanazawa. Luckily, I was able to take a later train and go back to get my knitting bag. I was amazed at how well I was able to communicate in Japanese, especially when I was so flustered.


Pattern: Natsa Sukka (Ravelry, mine)
Yarn: Knit Picks Palatte, taken from a kit I have for a vest.
Needles: US2/2.75mm
Timeframe: December 18, 2011 - January 6, 2012
Mods: None, it was a test knit.
Problems: I think my gauge tightened up in the foot, the 100% wool yarn was not the best choice, and my foot just isn't shaped right for short-row heels.
 
 Next up, I tested Orange Blossom from the same book. I used a gorgeous green yarn, so called mine "green blossom". I wear these socks weekly. The yarn and pattern just go so well together!

 
Pattern: Orange Blossom (Ravelry, mine)
Yarn: Indigo Moon Superwash in Heart of the Forest
Needles: US1.5/2.5mm
Timeframe: August 4 - December 11, 2011
Mods: Longer heel flap because of my odd foot.
Problems: None, love this pattern! The detail on the back down through the heel flap is just excellent.
 
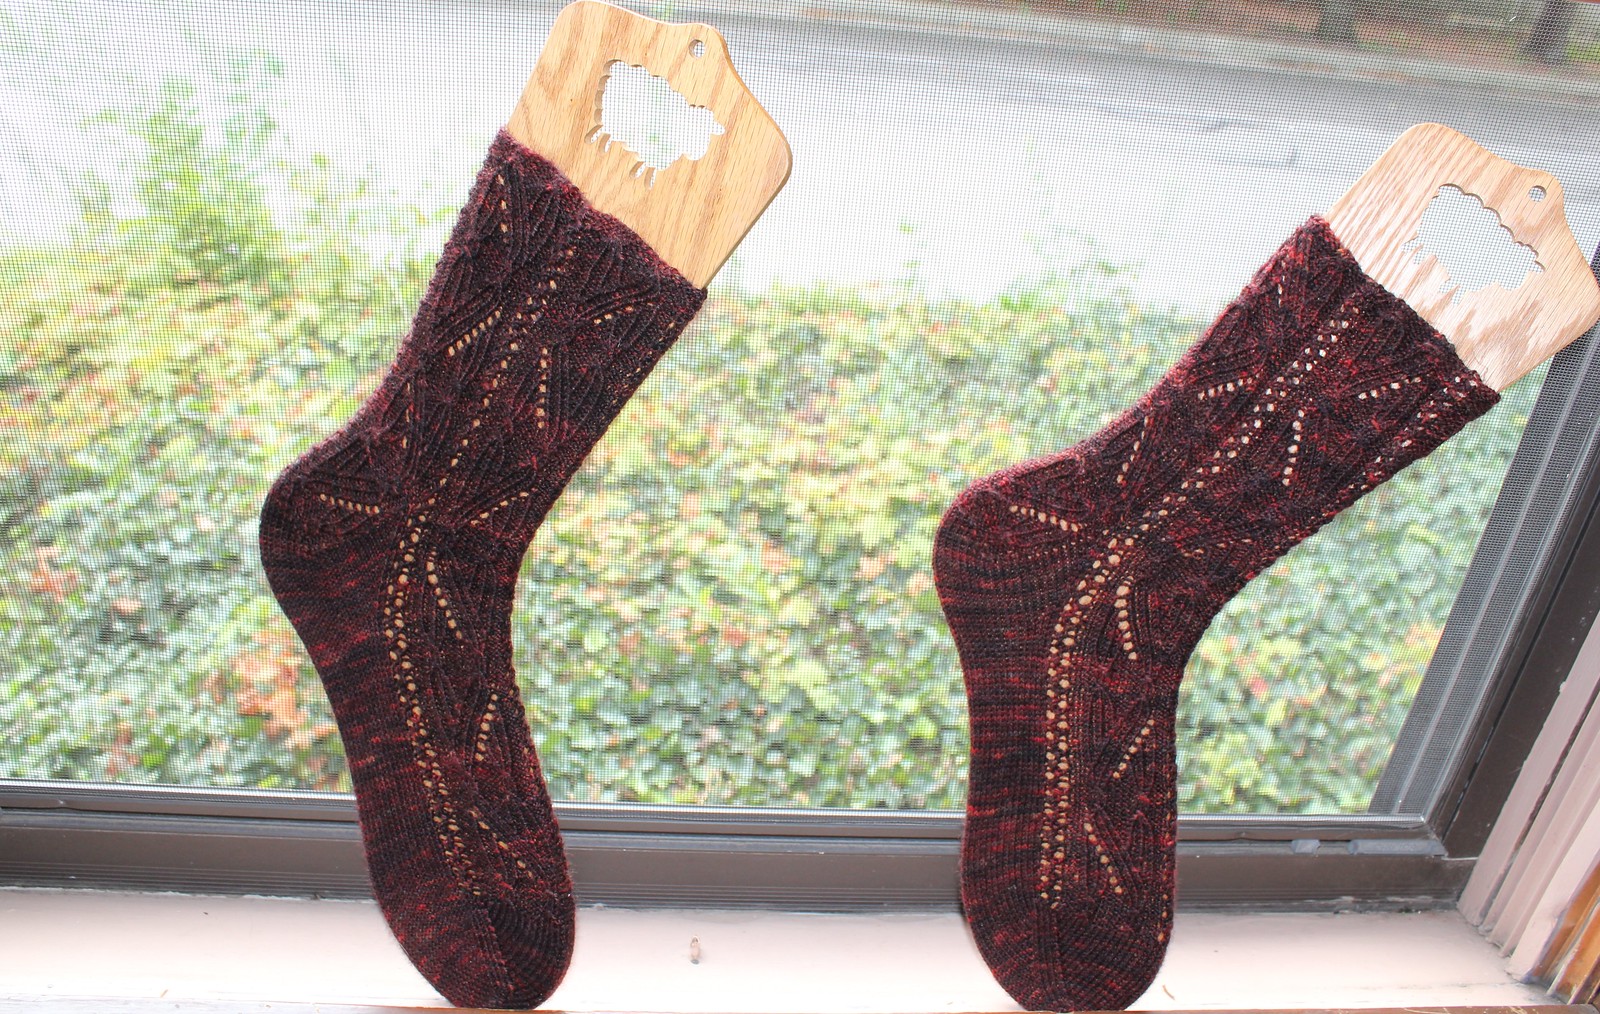
The third sock I tested for the book was Les Rideaux, another sock with patterning extending through the heel flap. I wear these weekly as well. The only real problem is that the pattern doesn't look nearly as good from far away as it does close up - these details are great, but would probably be better in a more solid yarn. I love it in the yarn I chose, but a more solid yarn might suit the pattern better.

 
Pattern: Les Rideaux (Ravelry, mine)
Yarn: Madelinetosh tosh sock in Loopy's Favorite Season
Needles: US1.5/2.5mm
Timeframe: December 17, 2011 - September 2, 2012
Mods: None, this heel flap worked for me.
Problems: None, though the yarn color seems to be fading fairly quickly on the bottom of the foot as I wear them.
 
I also finally finished Lee's Christmas socks, those evil things that I had to rip and re-do after feeling so good about them. I am happy with how they came out and think this pattern is a great pattern; I may make a pair of my own someday. I'm also pleased with the photo I managed to get of the pattern on the black socks:
 
 
Yarn: Regia 4 ply in Black
Needles: US1.5/2.5mm
Timeframe: December 3, 2011 - August 25, 2012
Mods: Made the heel flap 3" to match the foot of the wearer.
Problems: None, though now we must wait and see if he actually wears them!
 
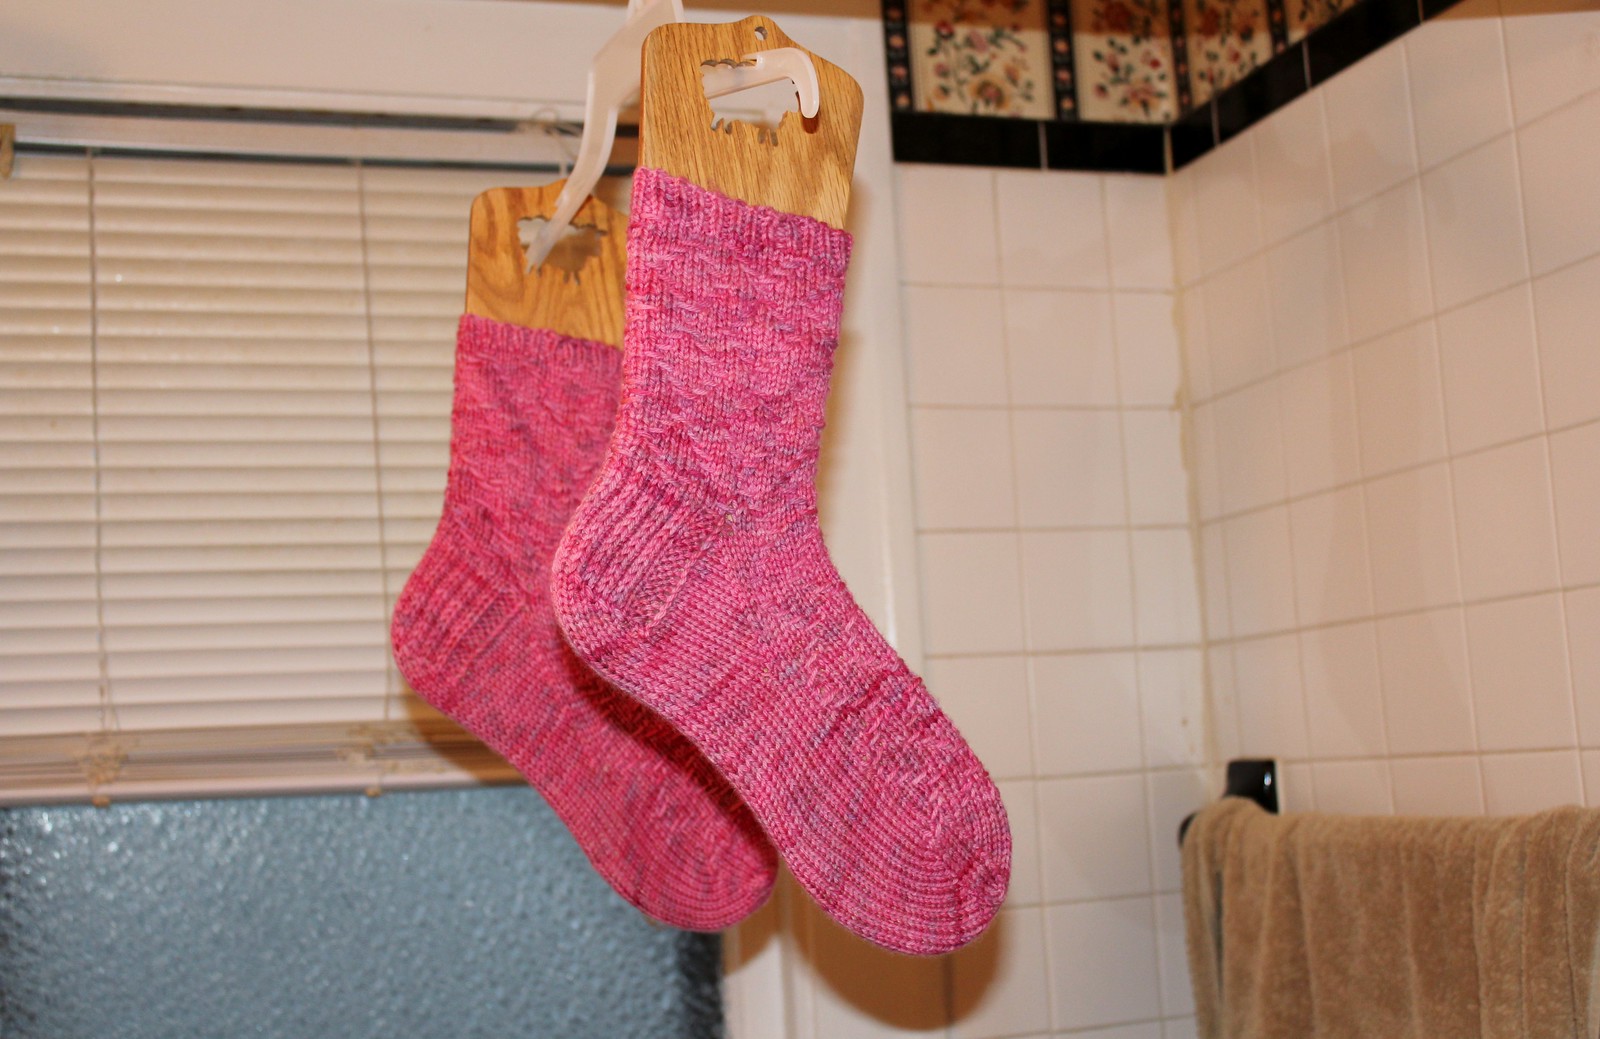
Finally, we've got the yearly worsted-weight pair of socks for my Mother-in-Law. She may have enough pairs at this point, I may need to make something else for next Christmas!
  

Yarn: Dream in Color Classy in Cool Fire
Needles: US6/4.0mm
Timeframe: September 4 - 17, 2012
Mods: I made the heel flap a bit differently, more like what I was used to than what the pattern called for.
Problems: I like the pattern and the yarn, but I'm not sure they make the best combination. My husband picked it out and liked how it turned out, I just wasn't a fan.

This year: make more socks for me, and maybe knit the second sock for the two single socks I have lying around. Maybe.
Saturday, January 19, 2013

Protip

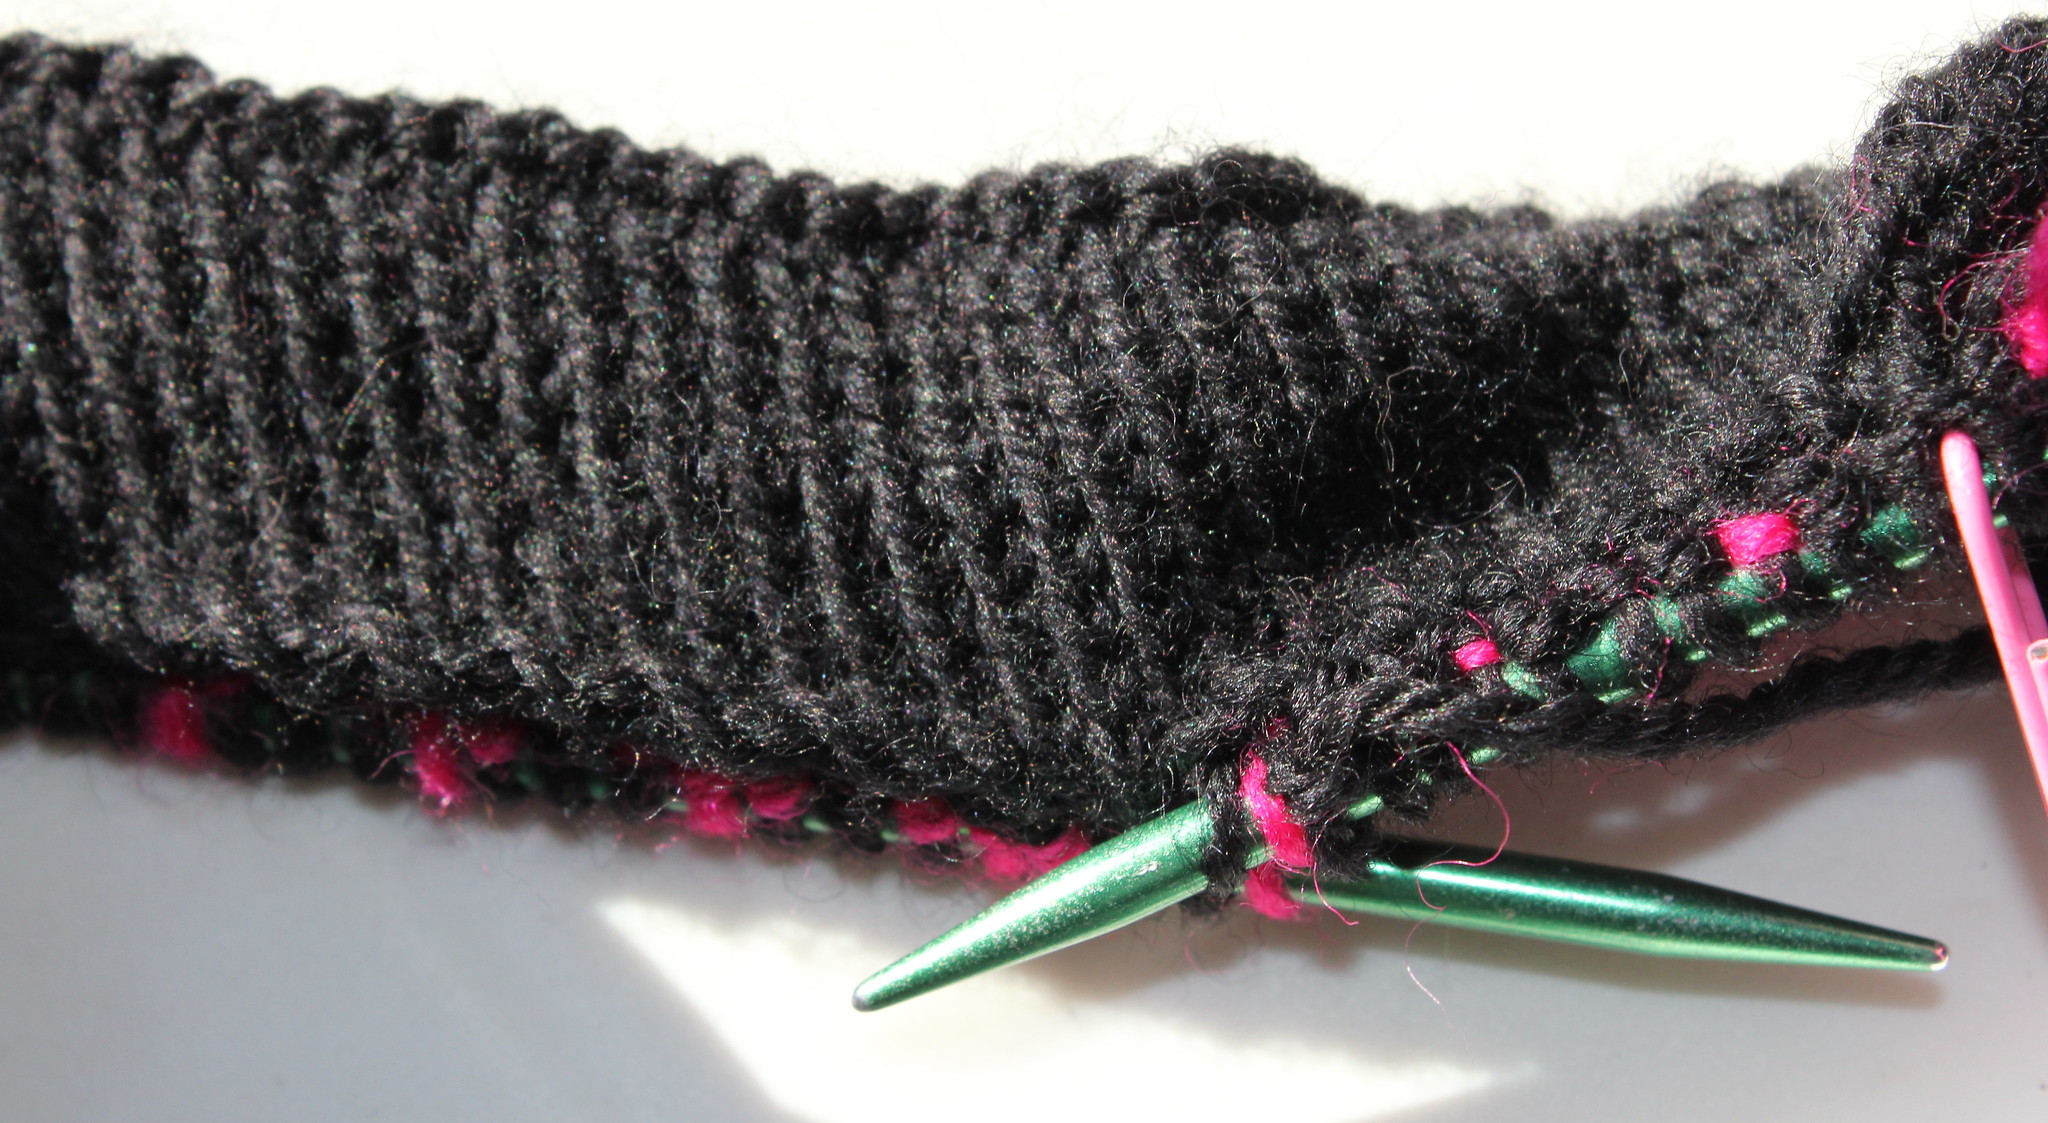
Using the same color waste yarn for a provisional cast on is not a particularly good idea. It is an especially bad idea if the color in question is black:


Ugh.

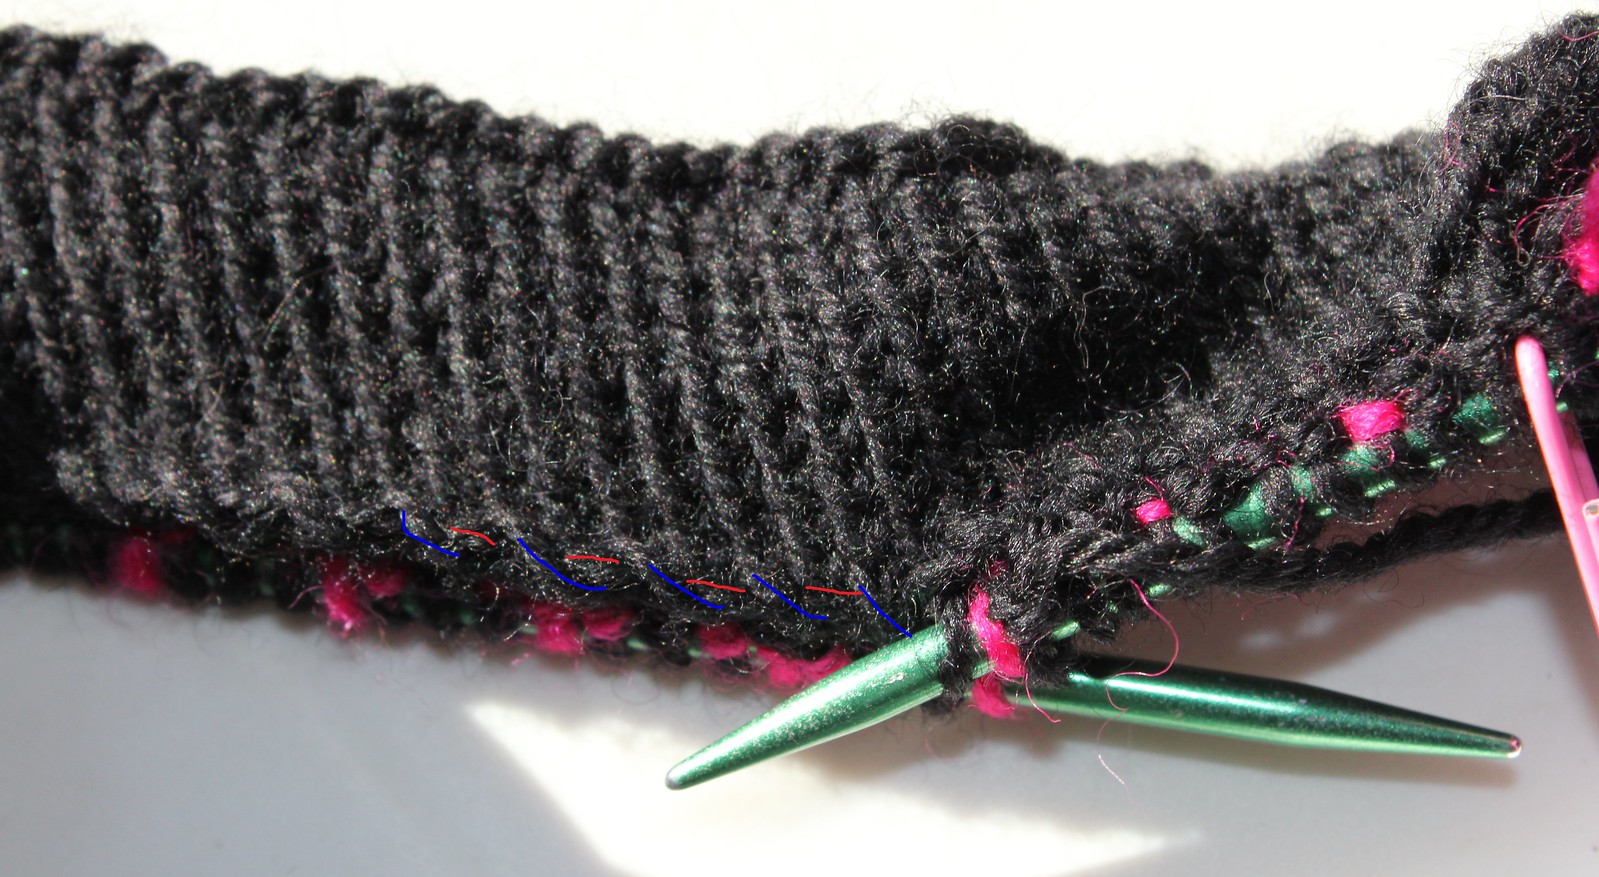
This is a fairly ingenious cast-on method. You use the crochet cast on, one of my favorites, but with waste yarn. When you pull out the crochet chain, you are left with your live stitches on waste yarn, easy to pick up and use. Unless of course you use black waste yarn on black live stitches. I managed to pick up all the correct loops; you can kind of see which are the live stitches and which are the waste yarn in the picture above. Here's a Paint-ed version, so you can more easily tell how it all fits together:

 
The red lines are the waste yarn, the blue loops are the live stitches to be knit together for the hem. You may notice that there is one live stitch for every two rows of ktbl in the hem - this pattern has you cast on half of the required stitches, then k1, yo for the first row. I like this method, it makes it nicer to either knit together or seam the hem later, with one live stitch for every two actual stitches. I also do my hems with ktbl. I'm not sure if it actually makes it fit better, but I learned that from knitting my Rogue and I thought it turned out well, so I'm using that technique again.

You'll probably see this sweater soon. I'm quite a bit further than these pictures would have you think, and I'm being nearly project-monogamous until it's finished. I've only got one simple stockinette sock in my bag as a backup for lectures and readings where the colorwork1 is too attention-consuming but I can/should2 still knit. Hopefully, a FO post with this gorgeous sweater soon!


1 This sweater is Norwegian-esque and almost every row is stranded. You can see the other color, the pink, peeking out from the prior row in these pictures. I cannot wait to wear this sweater, hopefully this winter!
2 I have ADD and knitting is a coping mechanism. It helps me focus. I know I've mentioned the fact that knitting helps me focus before, but I'm not sure if I've "come out" on this blog as officially ADD before. I am, I was diagnosed not too long after we came to Indiana, and it's good to know that many of my issues from anxiety to Imposter Syndrome to general disorganization stem from something that is not a moral failing. I may blog about that in the future, but I keep this blog mostly craft-related, so I may not.

Thursday, January 17, 2013

Finished Telemark Ski Sweater

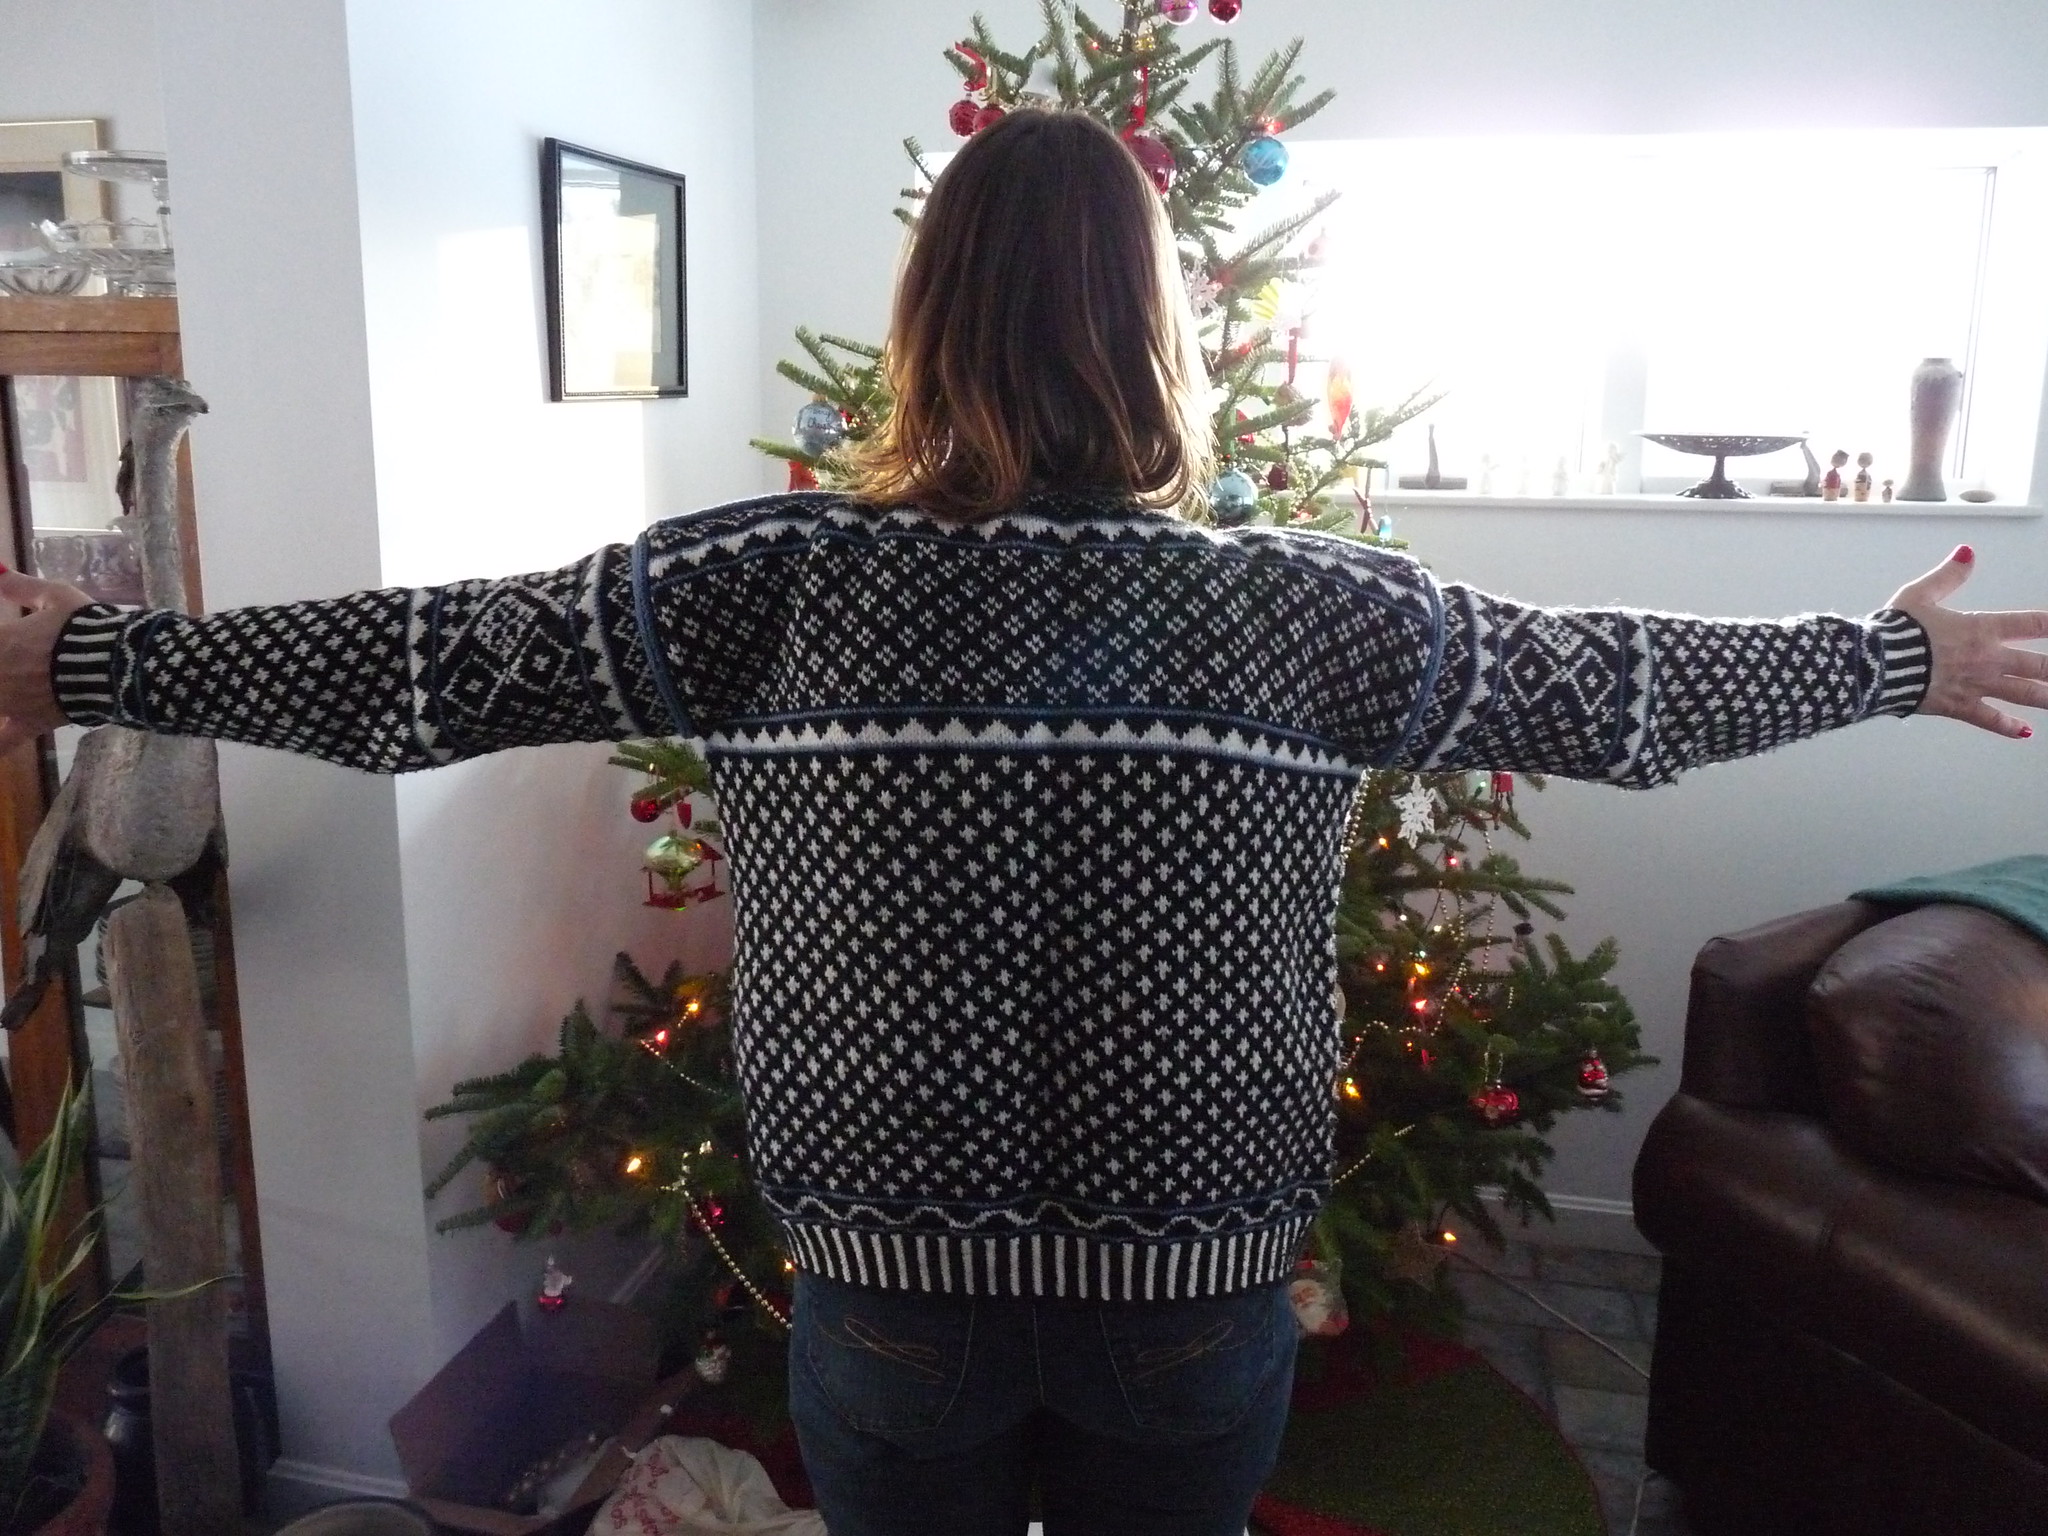
I finished this awhile back, but didn't get pictures of it until this past winter break. This is a cardigan I made for my mom, my first major steeked colorwork piece and I do believe it turned out quite nicely:


Pattern: Telemark Ski Sweater (Ravelry mine)
Yarn: Knit Picks Telemark in Black, Drift, and Colonial Blue
Needles: US5/3.75mm
Timeframe: July 31, 2008 -July 31, 2012
Mods: Made it into a cardigan.
Problems: I had gauge issues in the beginning and I worry that the steeked bits won't hold up, but so far so good, she's been wearing it a lot for the past two winters so it seems like the construction is good! For the full rundown of problems and a pictures along the way, check out my Ravelry project page.
 
It might not be the best colorwork sweater or the best example of a Norwegian sweater, but it is the first step towards Dale of Norway sweaters. Some day, I shall knit my mother, myself, and my husband (at least) actual Dale of Norway sweaters, but that time is not soon.


Sadly, no picture of the floats, but at least I finally got FO pictures of the sweater itself!

Tuesday, January 15, 2013

Christmas Ornaments

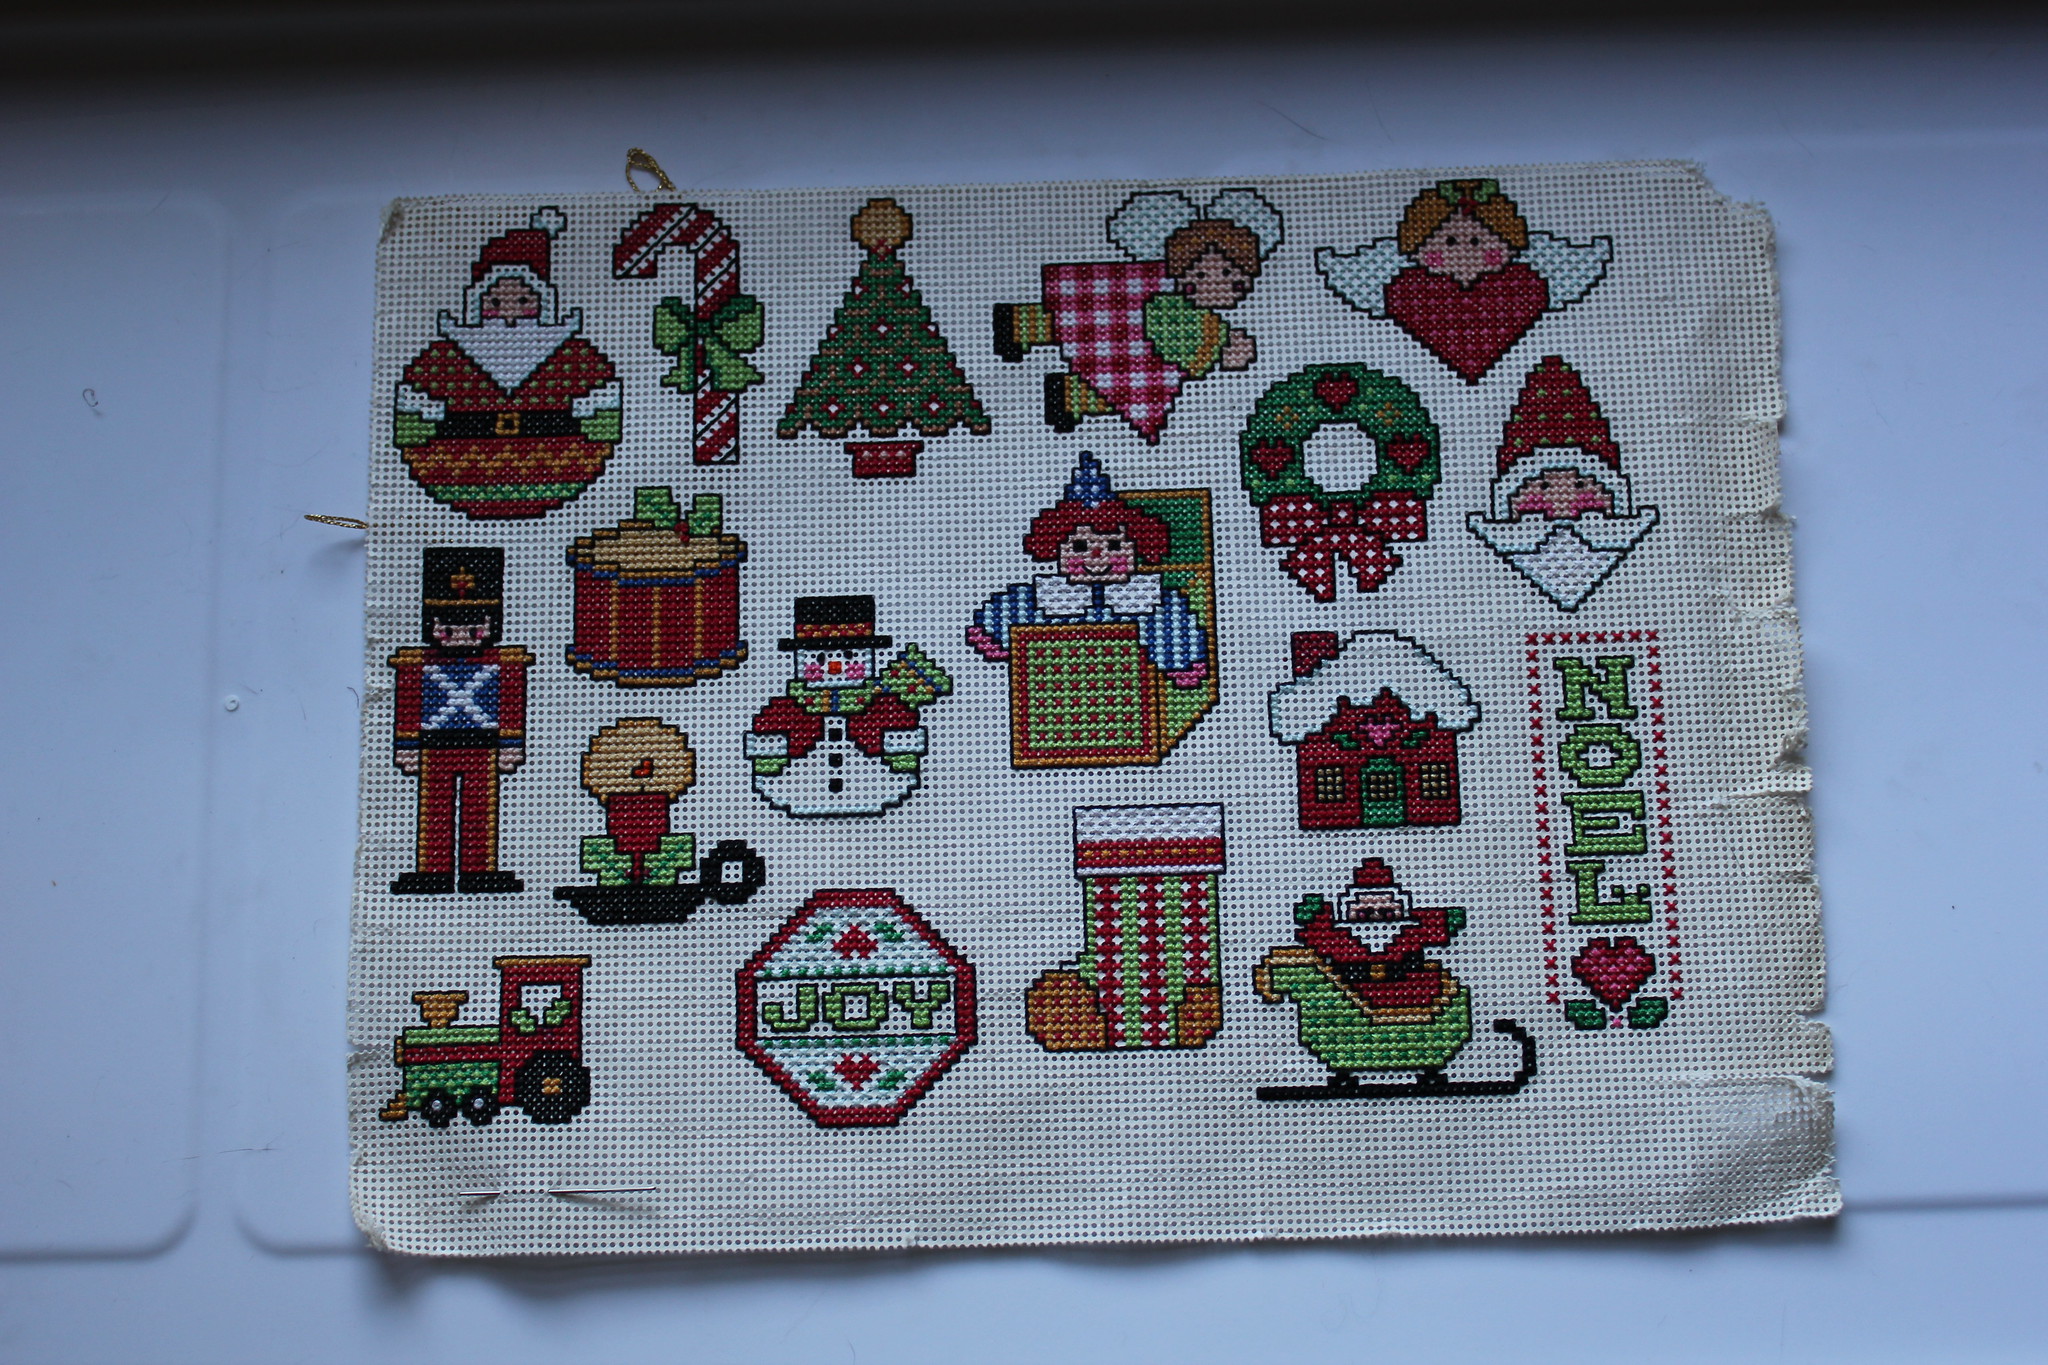
I finished this kit of Christmas ornaments last year, bringing my cross stitch count down to four: Two massive Art of Disney cross stitches, one medium Christmas Ornaments kit, and one medium-small Pillowcase set that I found when reacquainting myself with my US stash.

Finished Set

This was a kit I got on eBay that seems like it was originally from a small-time group of some sort. The pattern was hand-drawn on graph paper and the thread itself was not labeled as a brand-name of any sort. I used the leftover thread for the biscornu and the Skullcrusher Mountain cross stitch.

Back of stitching

I put some fancy red paper on the back to finish them off, but apparently didn't take any pictures of that. I'll probably use them as gift tags in the future. I managed to get a picture on my little tree this year:


Sunday, January 13, 2013

Clogs of 2012

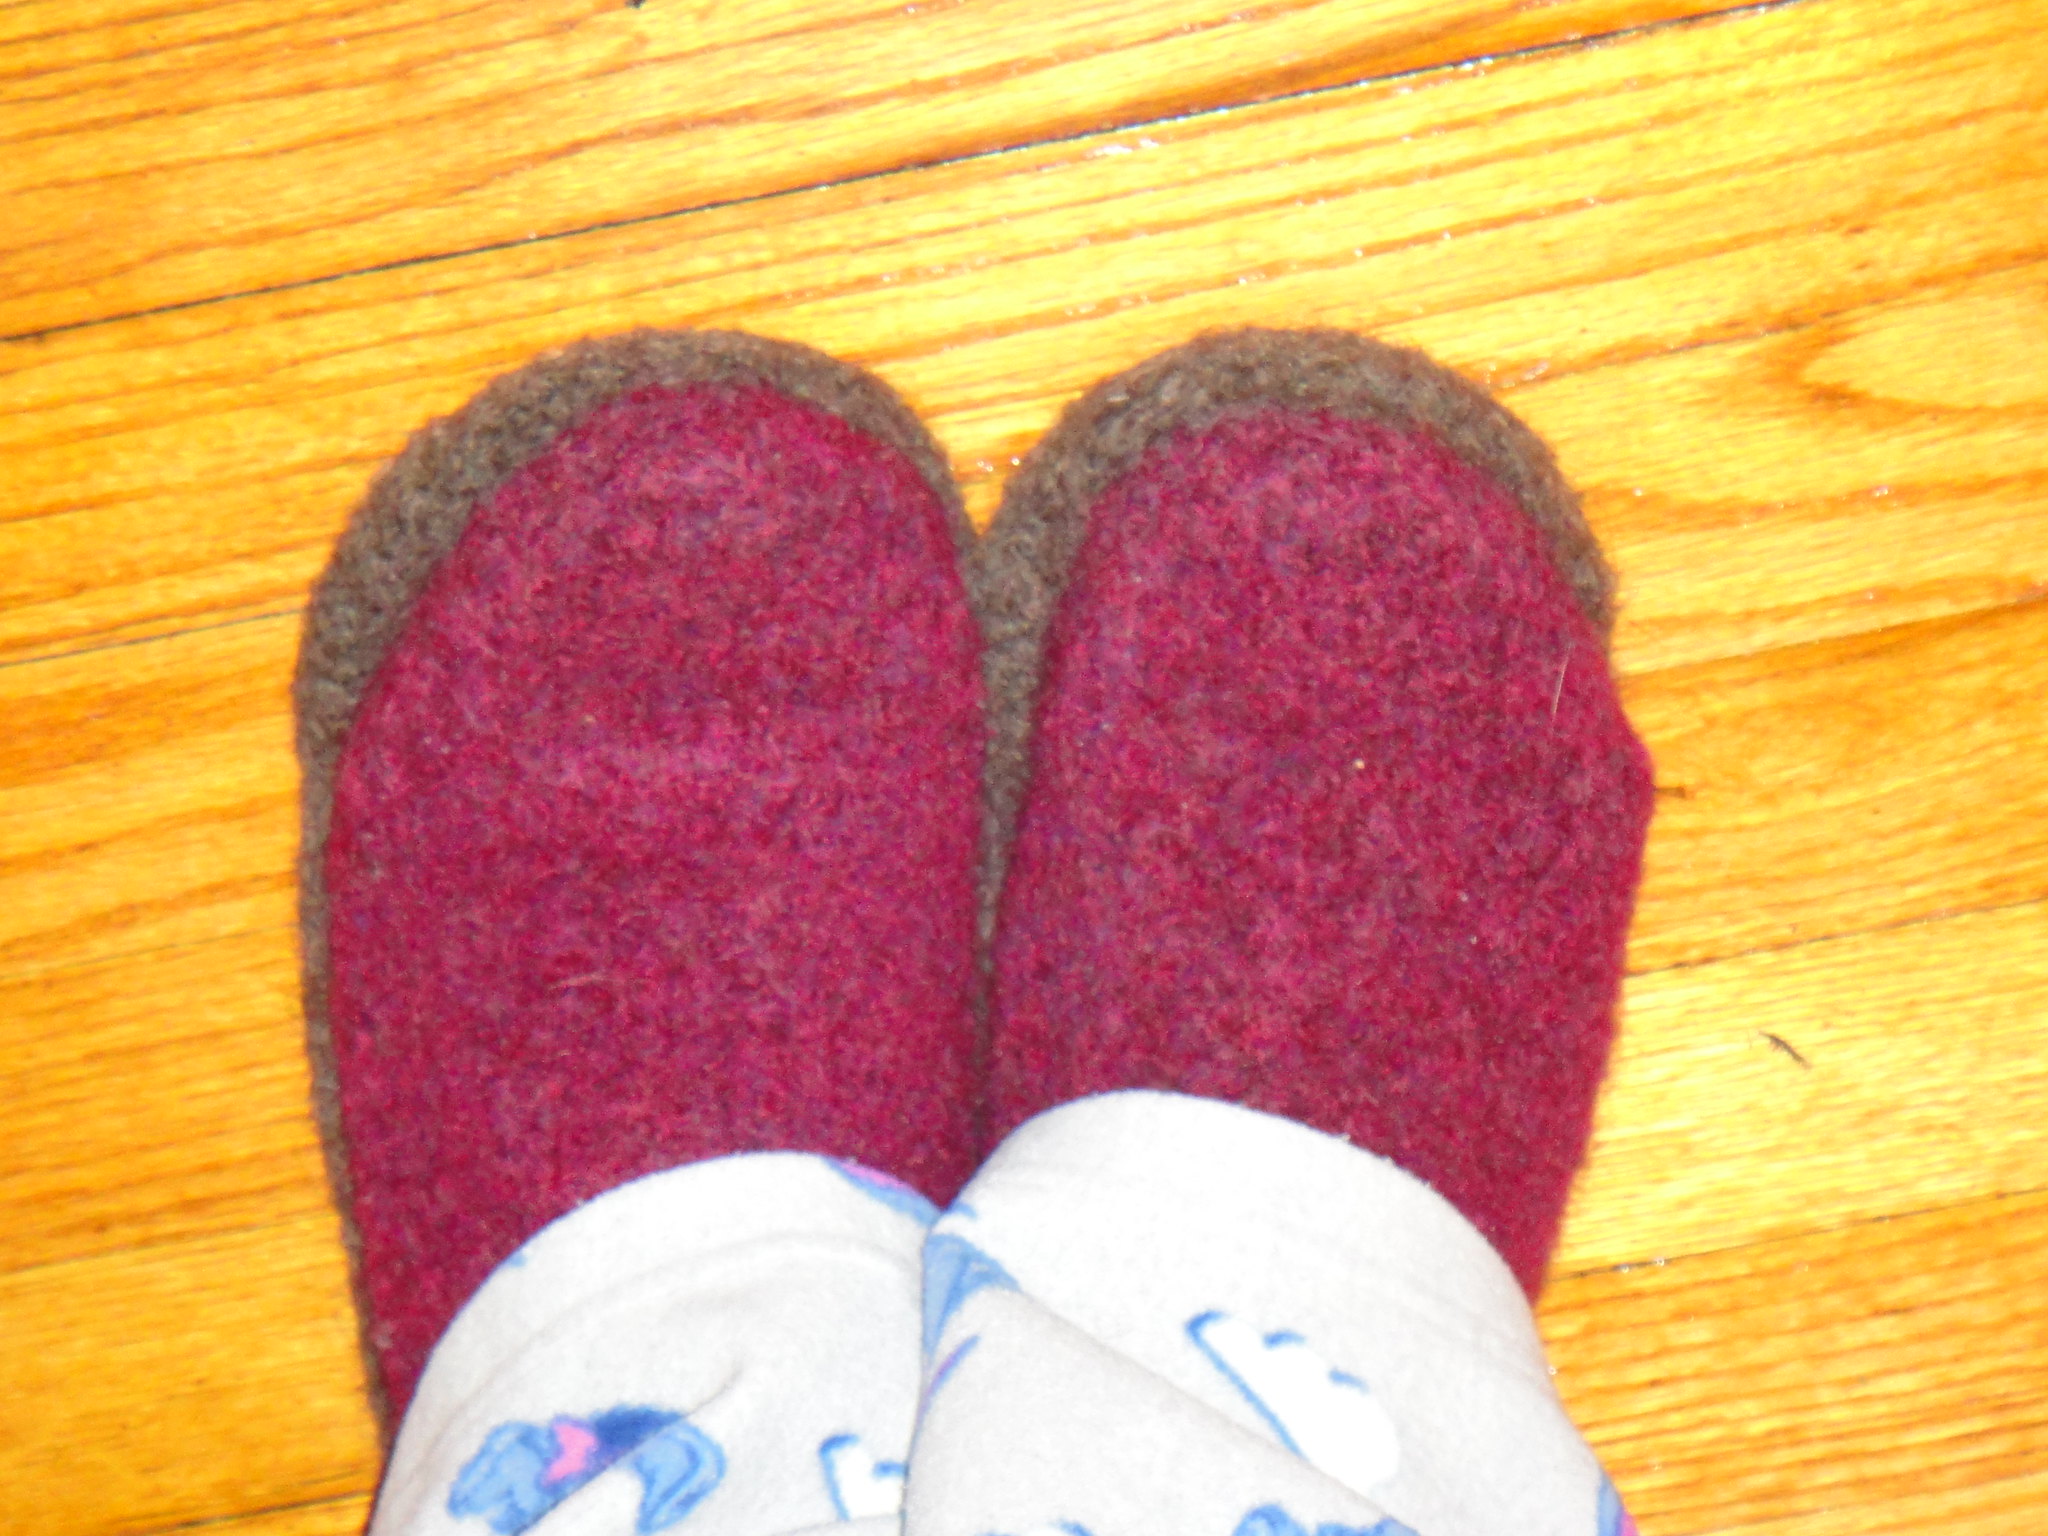
I made three pairs of clogs in 2012, a pair for myself, Lee, and my sister who asked me for some. Lee and I wore through ours in Japan, so threw them away when we moved. Our current place has all hardwood floors and no rugs, so new slippers were a must when the weather began to cool! I love the

Mine, very similar to my old ones but pink instead of red (and a rather bad picture):


Yarn: Patons Classic Wool in Plum Heather and Lion Brand Fisherman's Wool in Nature's Brown
Needles: US13/9.0mm
Timeframe: September 18 - 30, 2012
Mods: I use Judy's Magic Cast-On to start the soles because I hate seaming.
Problems: None, love this pattern!

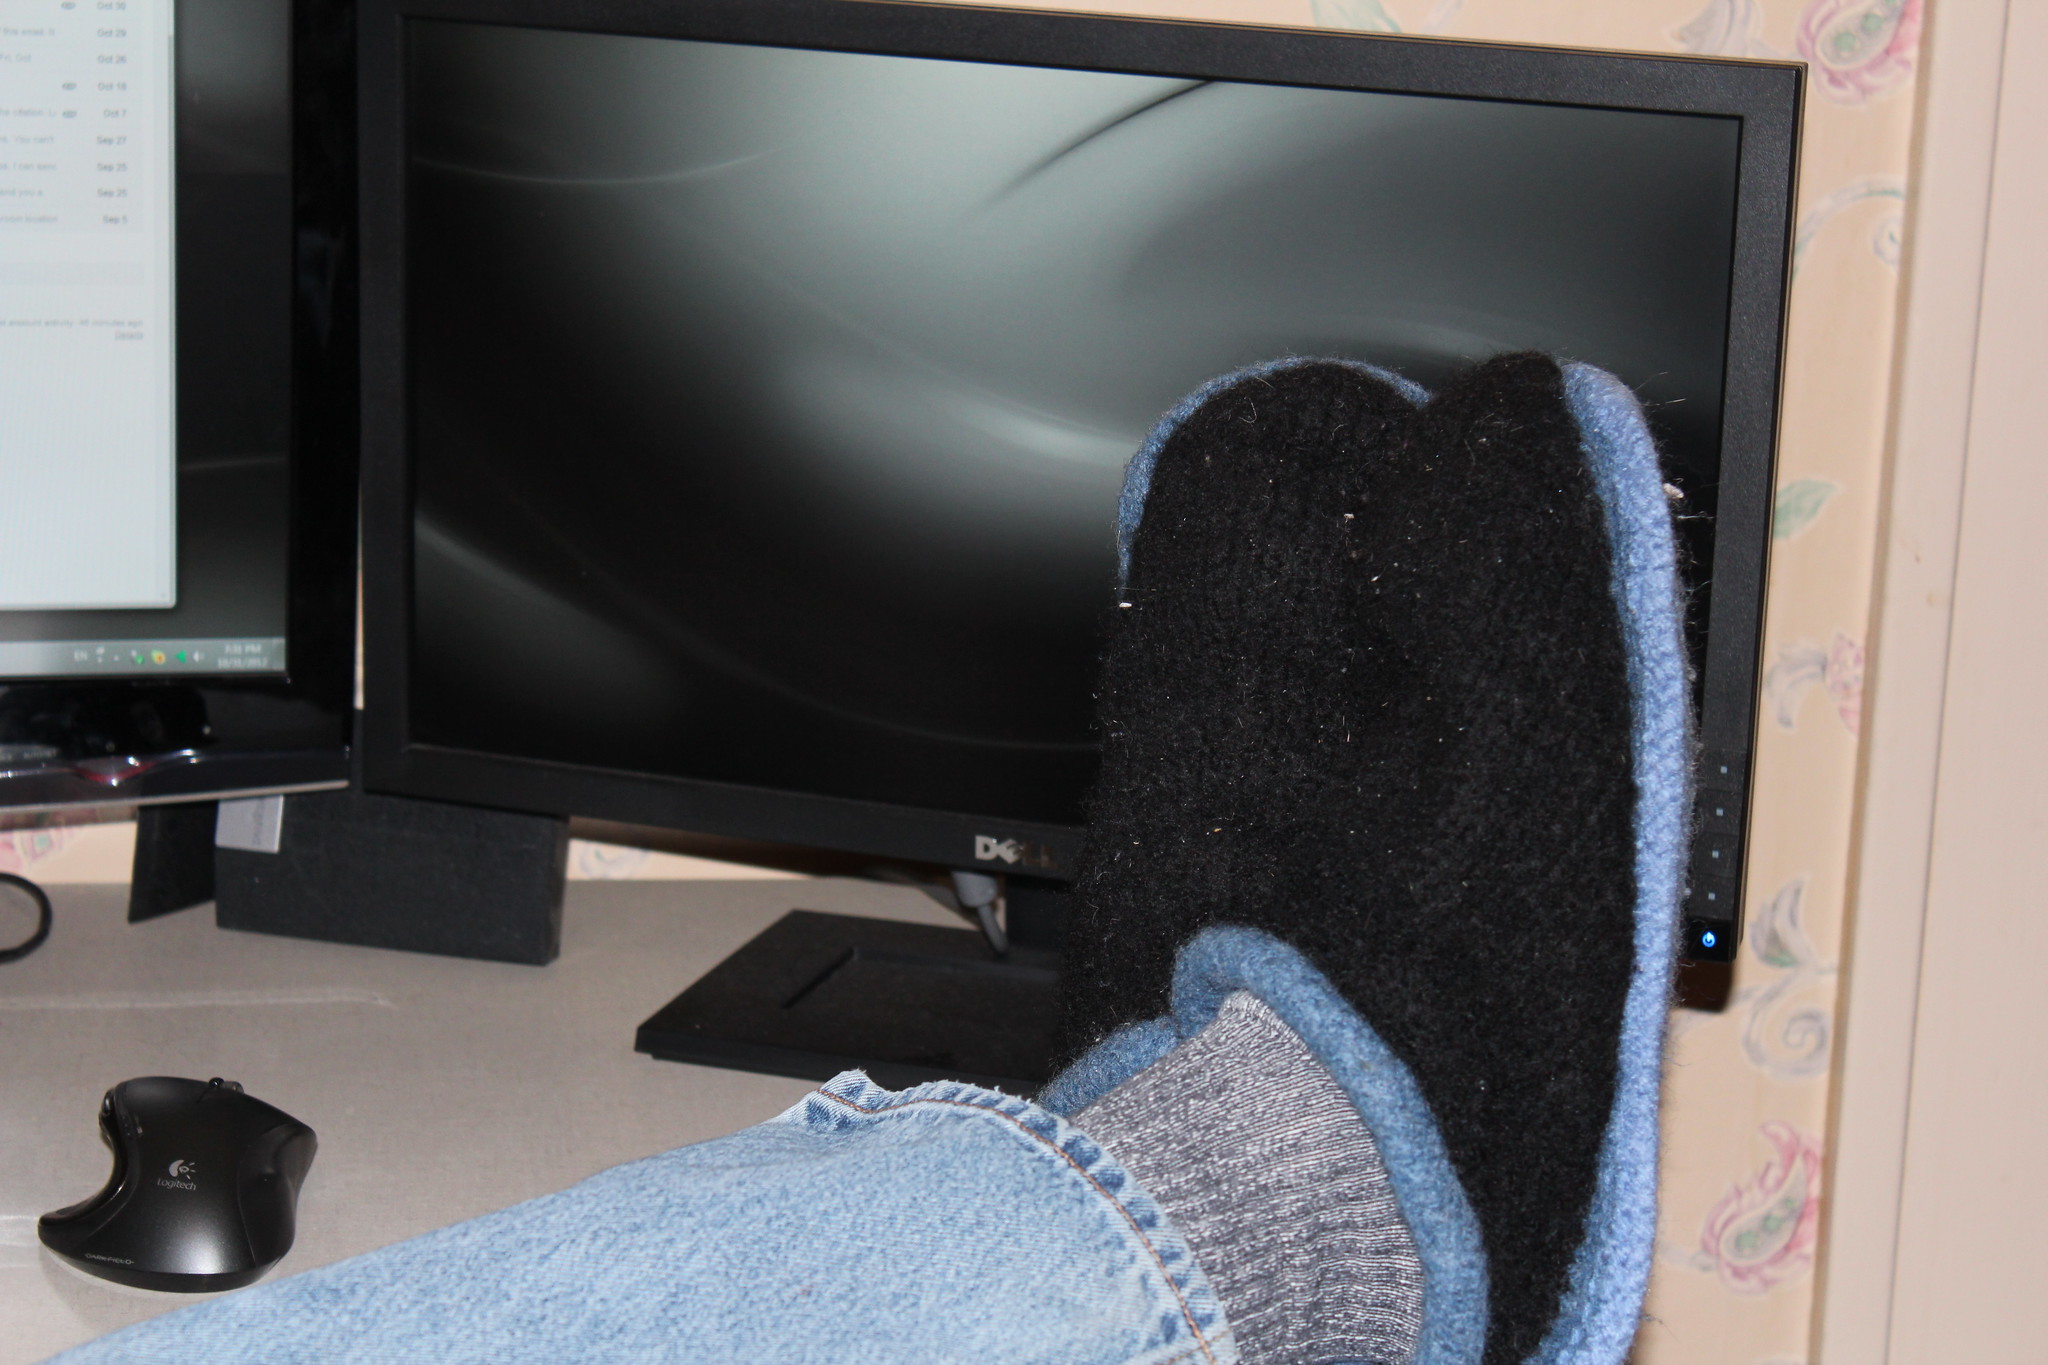
Lee's (also not a great picture), colors chosen based on what stash I had available:
 
 
Yarn: Knit Picks Wool of the Andes and Japanese wool in Black, Patons Classic Wool in three blues for the cuff and sole.
Needles: US13/9.0mm
Timeframe: October 9 - 27, 2012
Mods: I use Judy's Magic Cast-On to start the soles because I hate seaming.
Problems: I ran out of both of the original colors and had to use some other black and blue yarns from the stash to finish. He doesn't mind, and I got to use up more stash, so I'm not complaining!

My sister's (also a bad picture), in the requested Barney the Dinosaur colors (though I think the green is a bit bright). In retrospect, I should have needle felted three green dots onto the purple for more Barney-ness:


Yarn: Patons Classic Merino in Royal Purple and Leaf Green
Needles: US13/9.0mm
Timeframe: November 21 - 30, 2012
Mods: I use Judy's Magic Cast-On to start the soles because I hate seaming.
Problems: None, except that I wanted to finish them by Thanksgiving but forgot to start them until, oh, the day before.

Friday, January 11, 2013

Biscornu

Last time I talked about the pincushion I received from a swap. This time, now that my partner has her biscornu, I'm going to show of the one that I made! I made a handheld one, roughly the size of a typical tomato pincushion so my swap partner could use it as a pincushion rather than earrings or a scissors fob or something like that. Biscornu earrings are adorable, and I may have to make myself a pair someday!

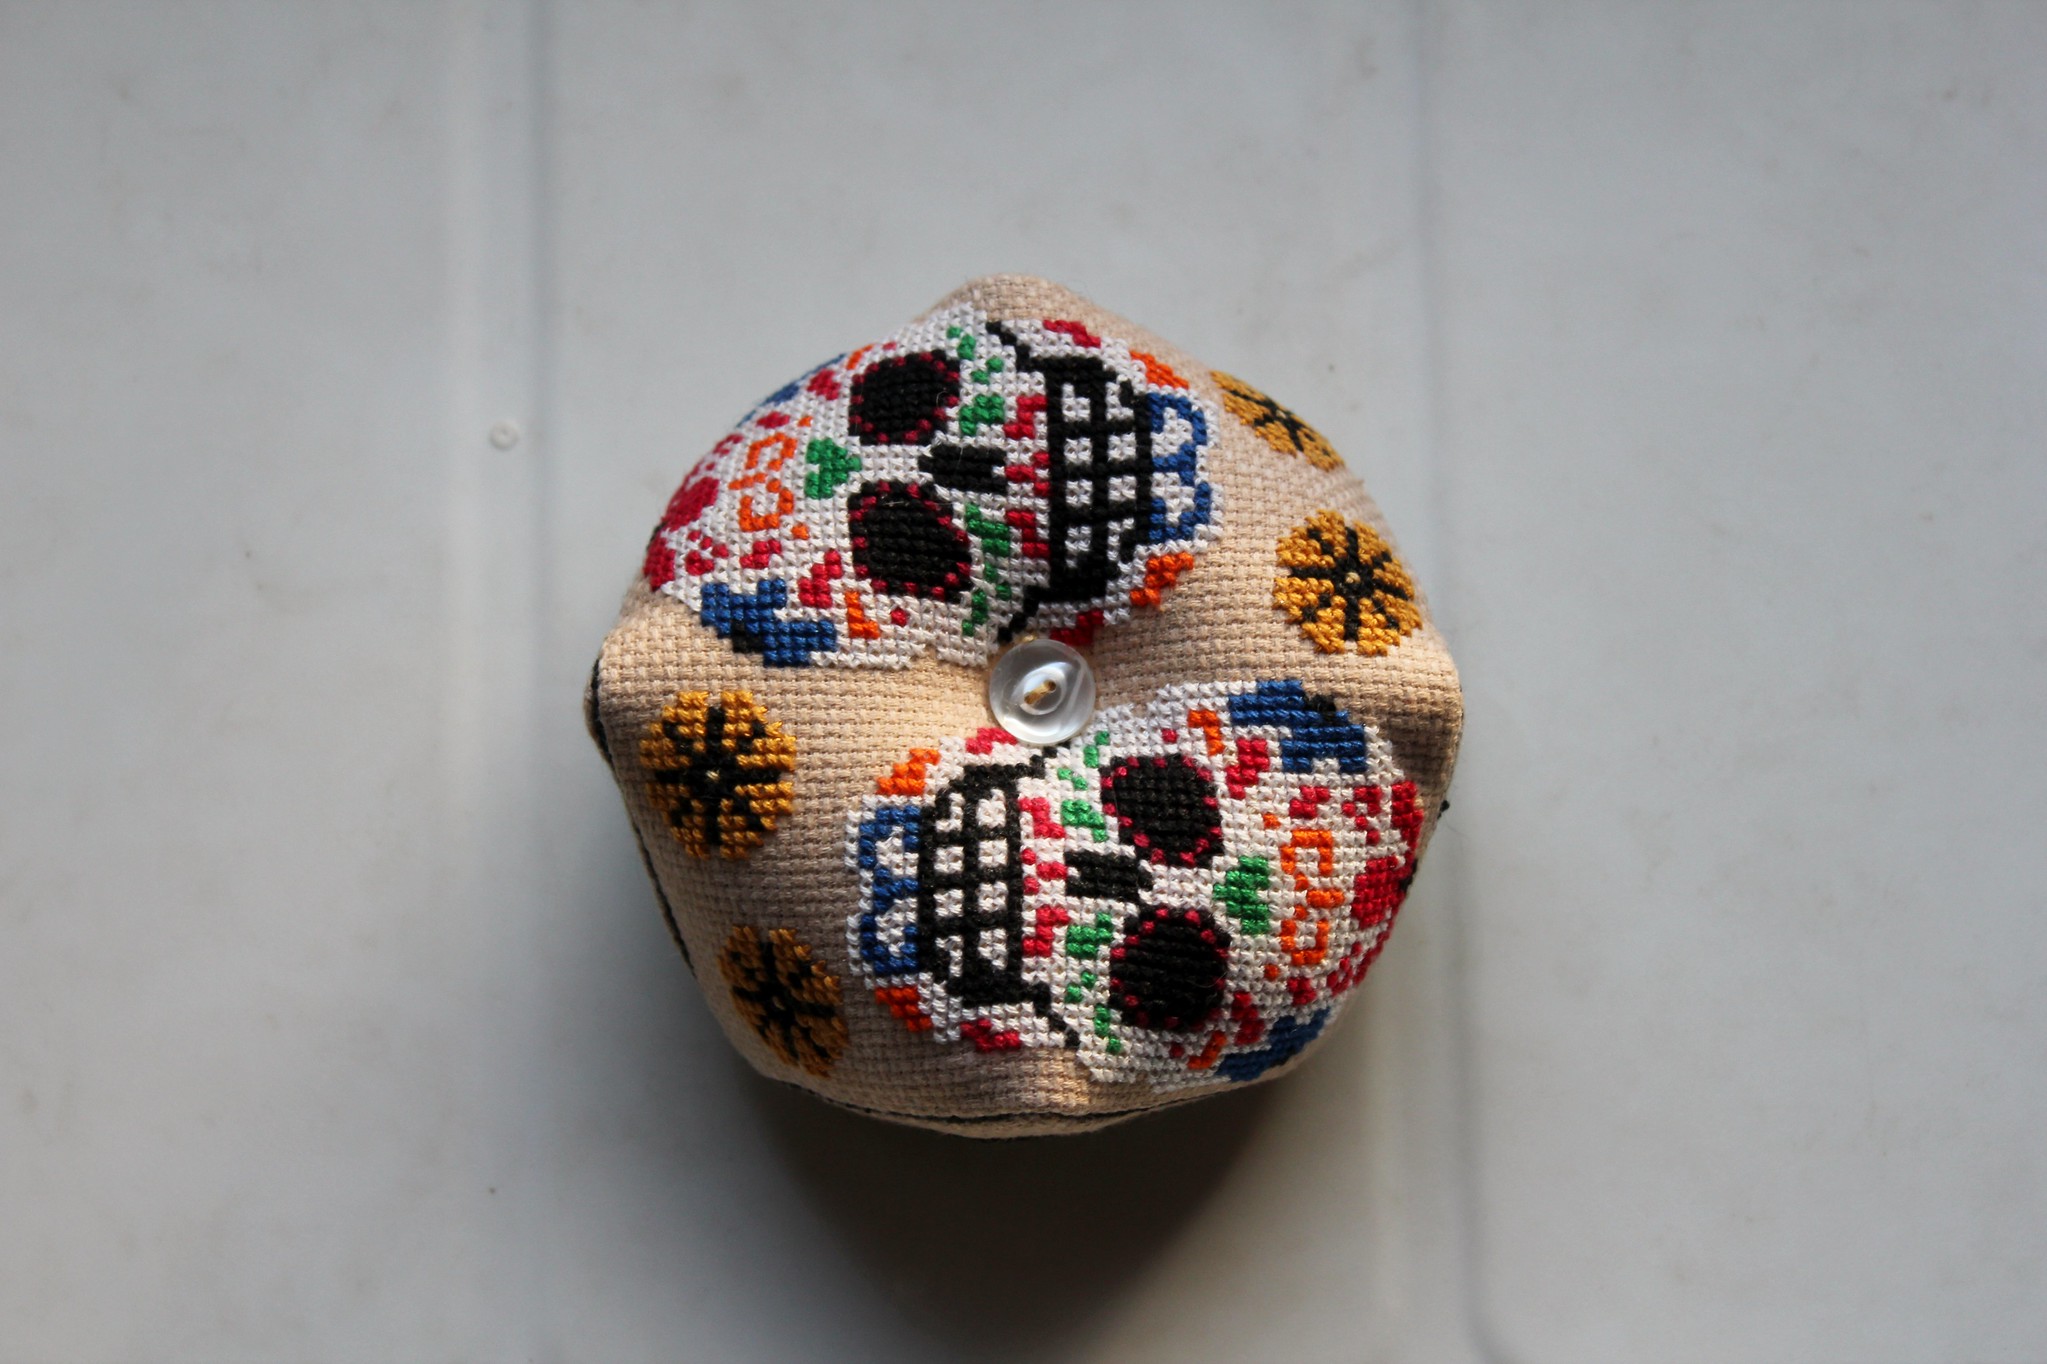
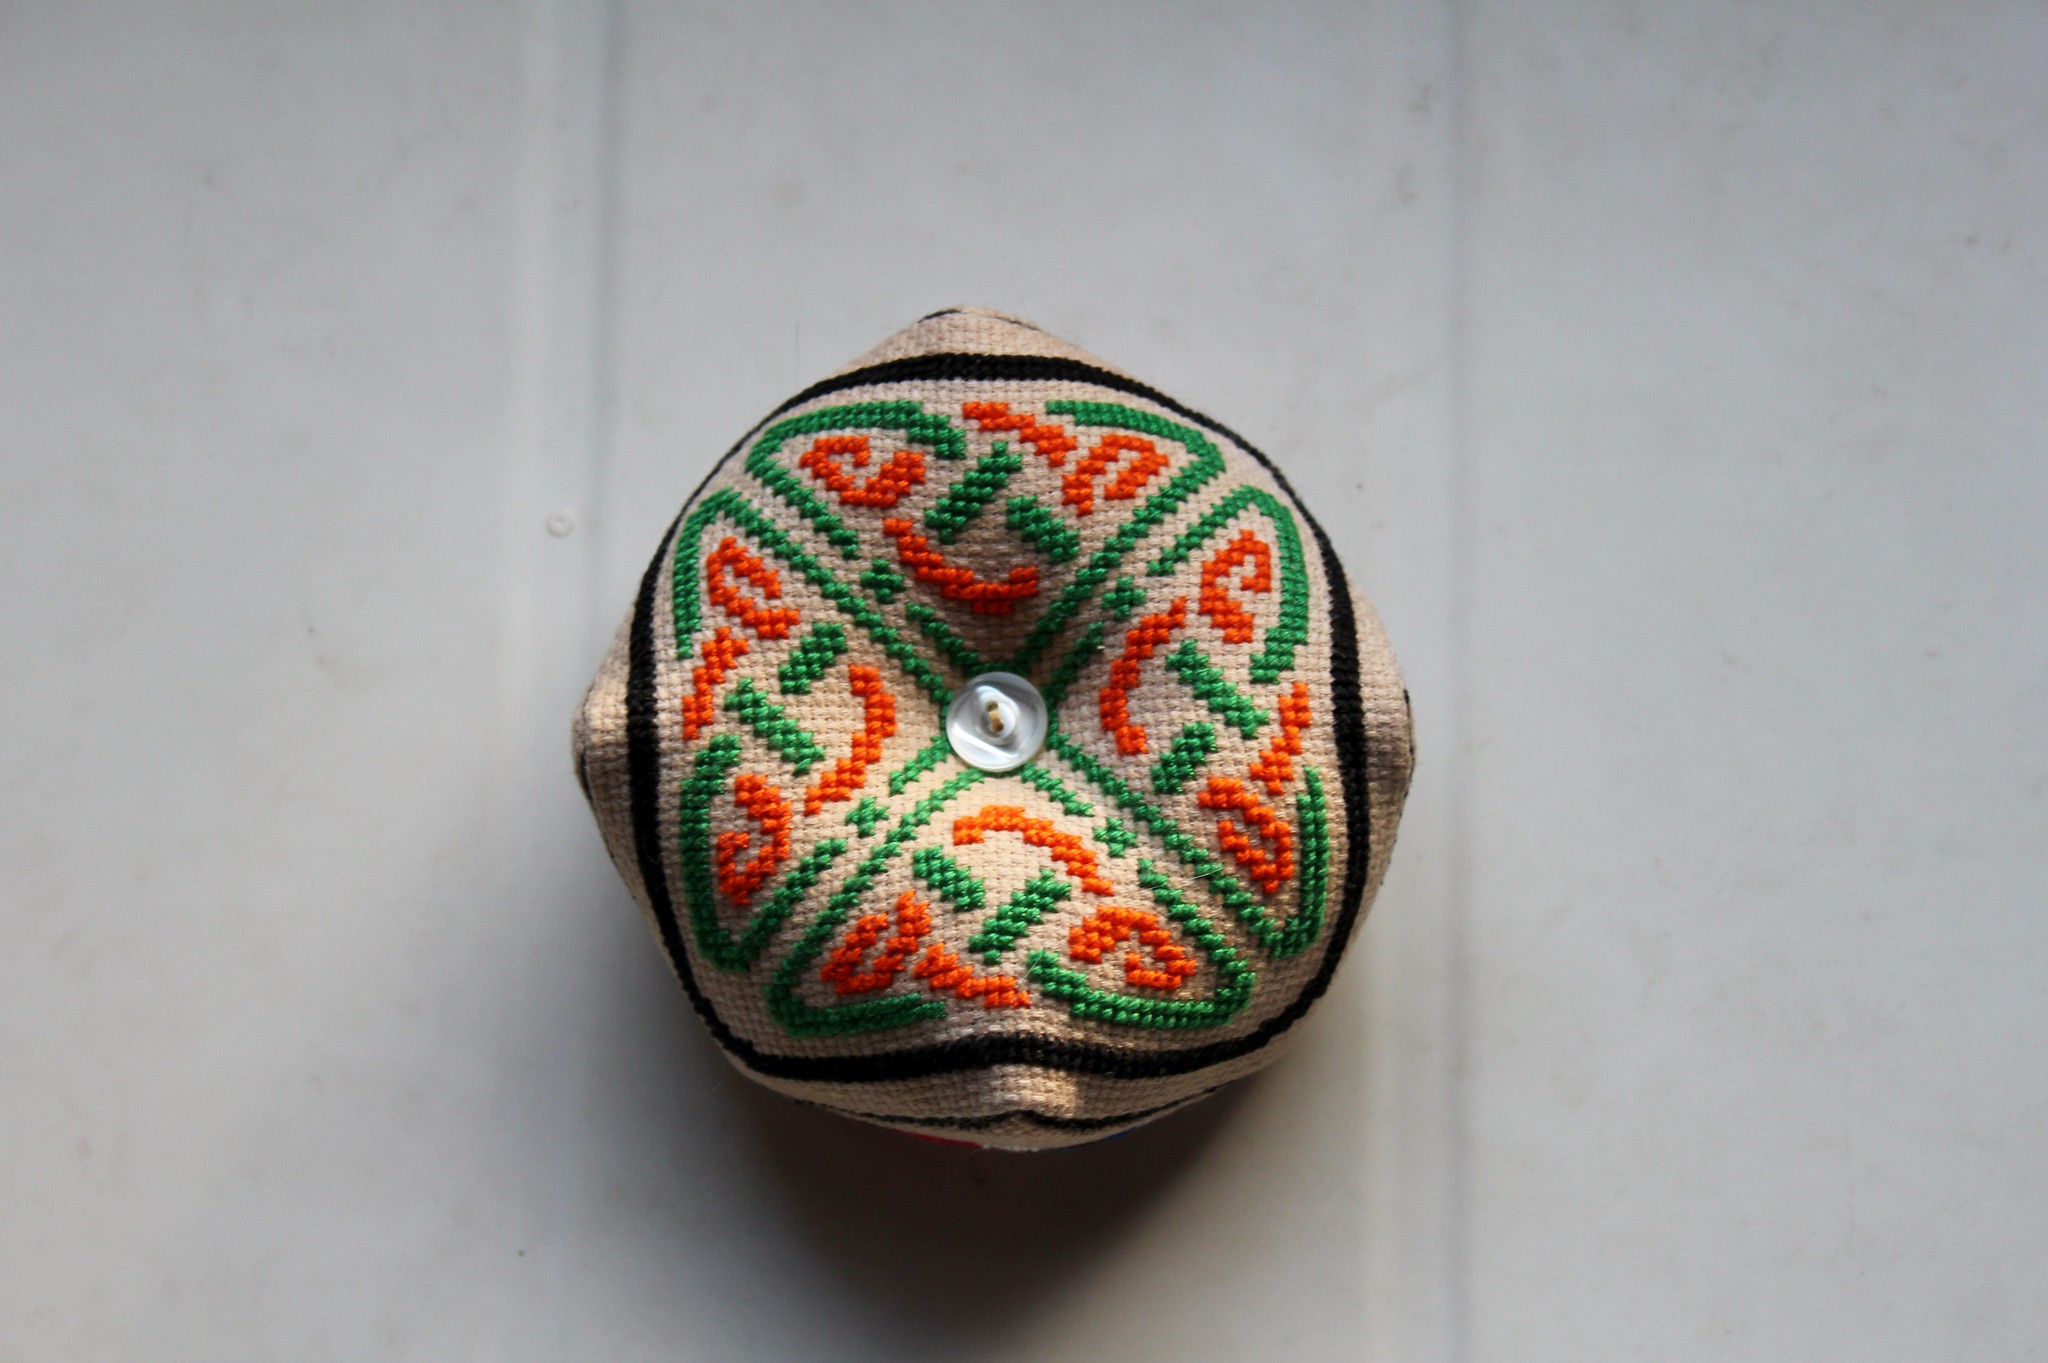
For my partner, I chose an Ink Circles design for the bottom and a Day of the Dead free pattern I found for the top, adding some flowers to fill out the stitchable area. I dyed the Aida cloth with tea so the white skulls would stand out against it, and then stitched the two designs:


Obligatory backside pictures because I love them so much:


I followed a tutorial through Own Two Hands when putting the biscornu together. Next I outlined them so they had the same number of backstitches around for seaming. I also added some scrap fabric for stability and to be sure the stuffing doesn't come out too easily:


Finally, I seamed and stuffed it, adding buttons to the center of each design to pull in the middle so it is in fact a pincushion and not somewhat spherical:


Top view, biscornu'd:


Bottom view, biscornu'd:


I am so very pleased with how it turned out! I'm currently on a cross-stitch kick and want to STITCH ALL THE THINGS! but I have some knits I need to finish due to deadlines, some others that I really want to wear, and cross stitches don't count in the Harry Potter House Cup. I'm trying to earn ALL THE POINTS there - maybe next month I'll have something I can use a cross-stitch piece for.

Sigh. So many things to craft, so little time!